Commercial Roof Maintenance Approach: 7 Tips to Extend Your Roof’s Lifespan

Commercial property owners and managers must stay on top of roof maintenance to achieve a long service life or extend the life of roofing systems at the lowest cost. Every day, your building is exposed to the elements and experiences some degree of wear and tear as a result. Failure to be proactive about maintenance and repairs will cost you in the long run. It isn’t until the water starts pouring down in buckets that any serious action is taken. And the result is far costlier roofing systems repairs that cause much bigger headaches.

Basics Of Commercial Roof Maintenance

The first step is to hire a reputable contractor that can custom design an adequate proactive maintenance program for your roofing system.

Decide ahead of time which issues to handle in-house and which you need a professional contractor to address. Remember that your roof maintenance program is an invaluable tool for proper maintenance.

Get A Free Roofing Estimate Now!

What Should Be Included In Your Checklist?

With or without a professional to help you, having an idea of what will be on your checklist will help you in significant ways. A professional can also add anything to it that is specific to your roof. Here are the things that should be on anyone’s checklist.

Interior Signs Of Roof Problems

Examine your building’s interior for signs of water damage such as mold and mildew, water stains, and peeling paint. This will alert you to look for possible entry points for water on the roof above. Note: leaks can travel sideways through a building, so the cause of the damage may not be directly overhead.

Check For Dirt And Debris

Dirt and other debris can clog drains and cause roofing surfaces to rot or decay prematurely. Check for fallen tree limbs that can damage roof membranes and regularly schedule tree maintenance.

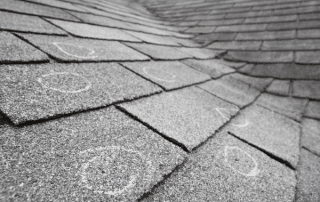
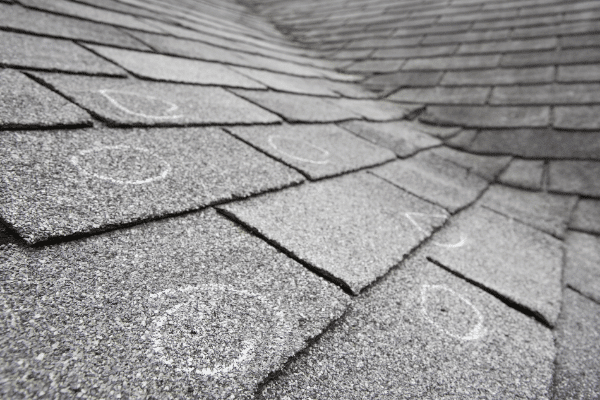
Check The Surface Area Of The Roof

Look for signs of:

  • damage or weathering
  • blistering
  • cracking
  • abrasions or deep scratches
  • tears or holes
  • fungus or moss growing on the roof, which should be removed

Inspect Expansion And Control Joints

Cuts, gaps, and tears indicate some repairs need to take place. The moment you see them, take care of them. Don’t wait or things can get worse.

Check Drains, Scuppers, & Gutters

Backed-up water, moss, watermarks, and mold point to clogged drains. Pay immediate attention to deteriorated or damaged flashings and seals.

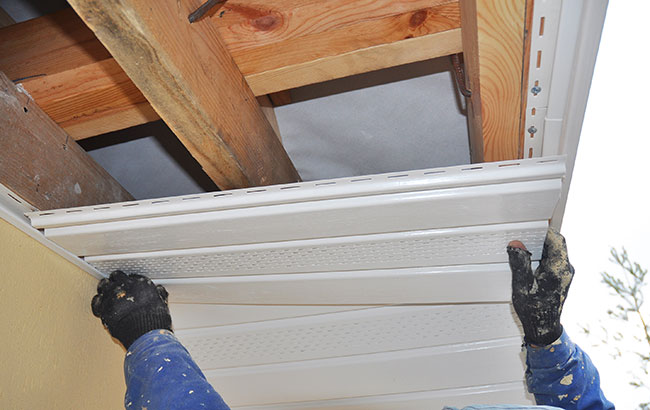
Inspect the Exterior Structural Components:

On your checklist, list chimneys, vents, pipes, skylights, and equipment separately. Look for signs of aging as well as structural damage.

tips for commercial roof maintenance

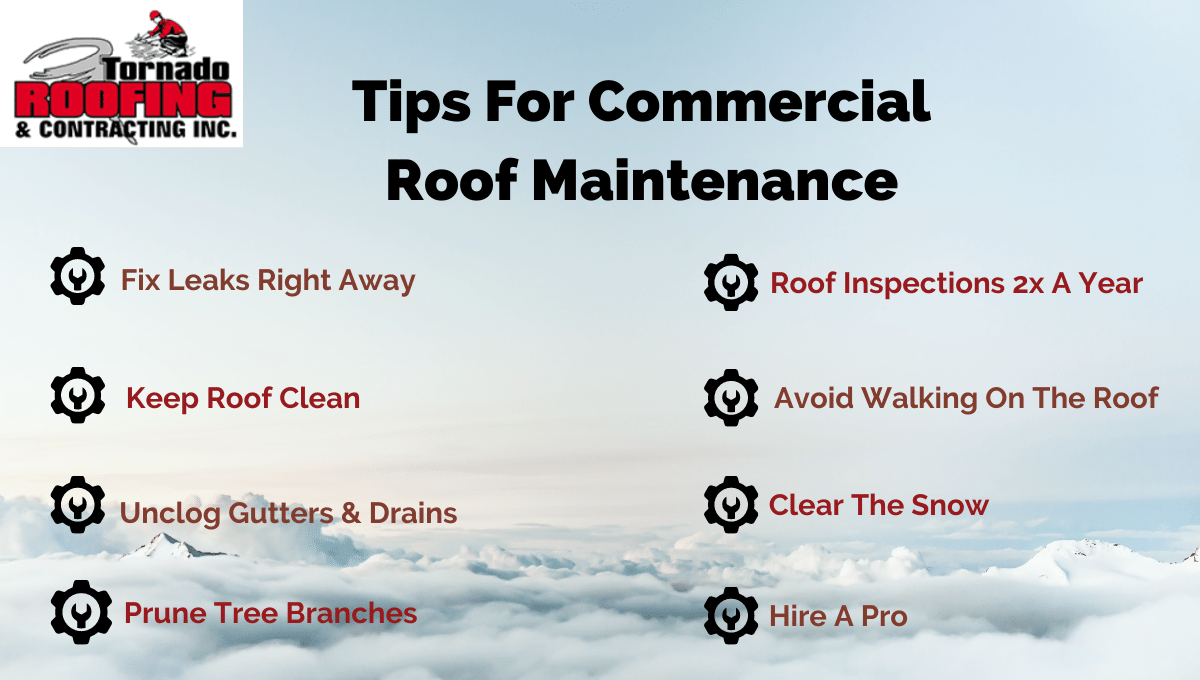
Tips for Commercial Roof Maintenance

Roof maintenance doesn’t take very much time and can save you tons of cash in the future.

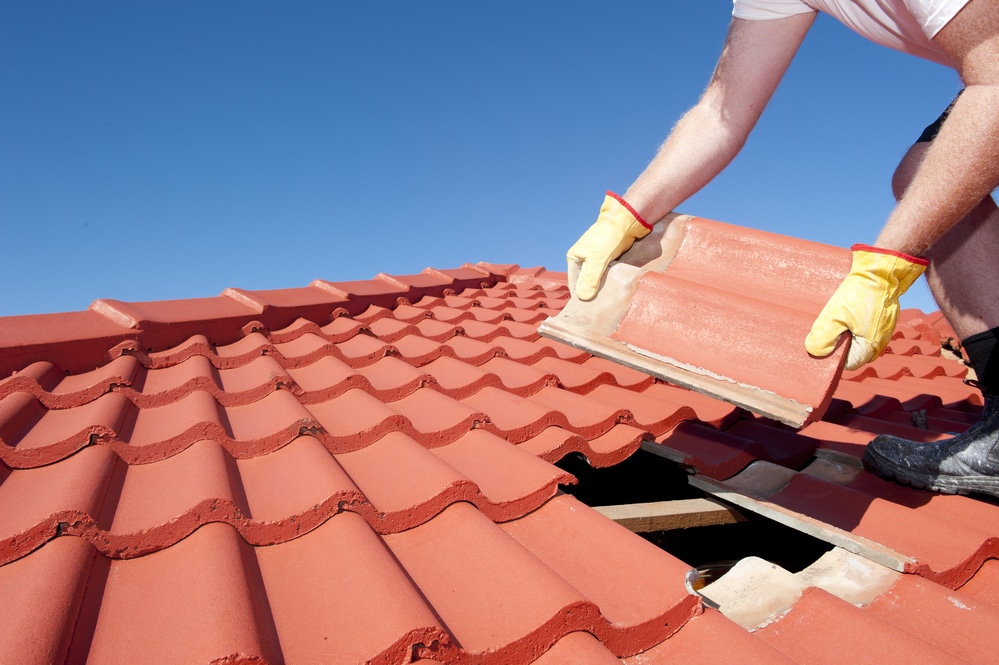
Get Leaks Fixed Right Away

Ignoring a leaking roof is the worst thing that a commercial building owner could do. Over time, a leak will only worsen and be more expensive to repair. It could cause all types of damage to your building, such as equipment or electrical damage. Even worse, it could cause your roof to collapse. Contact your roofing contractor immediately at the first indication that your commercial roof is compromised.

Get Your Roof Inspected Twice a Year

It is highly advisable to have a professional roofing contractor inspect your commercial roof twice a year to identify any potential compromises to your rooftop. Have your roof inspected for undetected leaks, cracks, sagging, or weak spots. Have a roofer check for possible problems around vents, skylights, eaves, and joints. You will especially want to schedule an inspection before winter sets in to avoid confronting roofing issues during freezing temperatures.

Avoid Walking on the Roof

The least amount of traffic on your commercial roof, the better. Consider installing walk pads that will stabilize the roof and prevent lasting damage. This can also prolong the lifespan of the roof.

Check Your Roof After Bad Storms

Storms with high wind, hail or heavy snow can cause damage to your commercial roof that might go undetected until it turns into a significant issue. It is advisable to have a special inspection after substantial storms.

Keep Your Commercial Roof Clean

Keeping your roof clean can help avoid a buildup of debris that can lead to clogs, algae, or mold growth. Any of these issues can lessen the life of your roof. Regular cleanings and making sure all equipment is clear of debris will protect your commercial investment for the long haul.

Regularly Unclog Gutters and Drains

Because rains and storms can direct debris to your roof drainage system, they need to be cleaned regularly to avoid clogs. Clogged gutters could lead to preventable leaks, mold and mildew, and a bunch of other issues for your roof. Check and repair any cracks, loosened gutters, or drains.

Prune Overhanging Tree Branches

Because falling tree limbs can cause significant damage to any roof, it is best practice to have trees pruned regularly. Not only will this eliminate roof damage due to broken limbs, but it will also better keep your roof clear of falling leaves or nuts. In addition, it will keep your roof from accumulating algae due to the lack of sun shining on your commercial roof.

Get Snow Cleared in Winter Months

If heavy snow sits on a commercial roof for an extended period, leaks, ice dams, ice cycles, and other problems can arise. If you accumulate snow, have an experienced snow removal specialist maintain your roof during the winter.

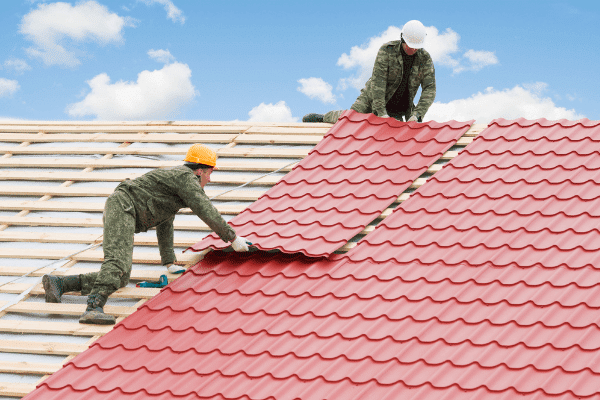
Hire a Professional Commercial Roofing Contractor

Ensure that your commercial roofing contractor is certified and has the proper training to handle your roofing needs. This ensures they will properly install the roof with little to no problems after that. Vet your roofer and ask for references that you can contact to make sure they are up to the job.

Final Thoughts

If you want something to last, you need to take care of it. Your building, more specifically your roof, is no different. You need to take care of it, which means developing a commercial roof maintenance plan, performing regular inspections and repairs, and performing special inspections after any events that may have damaged your roof. Once you build your commercial roof maintenance plan, be sure to write it down, let your team know what it is, and then follow it.

By |2022-02-25T19:40:44+00:00January 25th, 2022|Roof Repair|Comments Off on Commercial Roof Maintenance Approach: 7 Tips to Extend Your Roof’s Lifespan

A Short Guide To Residential Re-Roofing

The term “reroof” refers to putting on a new roof on an existing home or building. This is commonly done when the old roof is too far damaged to renovate it or to warrant keeping it.

For many homeowners, choosing between all the different materials used in roof projects can be the most confusing part of the entire process. Luckily, here are some factors that will help narrow the field and make it easier to make a decision:

  •  Location
  • Roof Pitch
  • Style
  • Price

The Most Common Types of Roofs For Residential Buildings

For residentials, the most common types of materials used are:

  • Three-Tab Asphalt Composition Shingles: the most common roofing solution as they are affordable, easy to source, and deliver. They typically last 20-30 years.
  • Wood Shingles: some homeowners choose shingles made from real wood. They cost more than asphalt and may require more upkeep and maintenance. They can last up to 50 years.
  • Standing Seam Steel Roofing: Metal makes for durable roofing material. They are expensive to install but in the long run, last much longer than most other types of roofs.
  • Tile Roofs: Tiles can be made of clay or concrete, both of which can last up to a century. The biggest issue is the cracking of the tiles.

When is it Time To Repair A Roof?

A personal assessment of the roof can be made to see whether it might be time for a new one. Upon accessing the roof, the following are common signs of trouble that indicate it may be time to call in some contractors for a repair:

  • Missing shingles
  • Loose shingles
  • Loose flashing
  • Damage to seals around the roof vents

When is it Time To Replace A Roof?

The following warning signs are indications that you may just need a whole new roof:

  • You can see “bald spots” on your roof
  • There is water leaking into your house
  • Most shingles are cracked or just brittle and about to crack
  • You are seeing a lot of granules in your gutters

If you notice any of these problems, it’s best to have them fixed right away. Waiting for more than six months could result in complete and catastrophic damage to your home and your belongings.

Another way to know when it’s time for a new roof is by judging the lifespan of the current system:

  • The asphalt shingles are more than 20 years old
  • The wood shingles are more than 25 years old
  • The slate shingles have been in place for more than a century
  • The tile roof is more than 45 years old

roofing options

The Process Of A Roof Replacement

You’ll feel more at ease with a reroofing project if the process is understood better.

Here are the basic steps involved in any roof replacement job:

  • Removal of the old roof
  • Repairs to the roof deck if necessary
  • Install protective features
  • Install the new roofing
  • Install flashing
  • Cleanup
  • Inspection

Allow Our Team Do The Job

We all know how important a solid roof is before and during hurricane season. Don’t let the weather catch you unprepared. Our skillful team comes with plenty of experience and can handle any roofing job necessary. Call us today and we will come and assess the situation and put your mind at ease.

Get A Free Roofing Estimate Now!
By |2022-02-25T19:41:50+00:00December 14th, 2021|Roof Repair|Comments Off on A Short Guide To Residential Re-Roofing

How to Get a New Roof From Insurance

For a place that gets intense tropical cyclones like Florida, it’s always wise to get insurance cover for your home. Your roof will be guarding against hurricane and storm winds that will inevitably contribute to its damage. This can happen overnight or after a while. Also, the sun rays and other weather variations destroy roofs over time. A roof cover ensures you are safe from any unforeseen damage or destruction of your roof.

As a roofing expert, we encourage our clients to get insurance cover that they can claim when tragedy strike. One of the questions they often ask us is how they can go about the claiming process. By the end of this article, you will understand how to get a new roof from your insurer without the hassle. Meanwhile, let’s have a quick recap of why you need a roof insurance cover.

Get A Free Roofing Estimate Now!

Reasons Why You Should Insure Your Roof

Over time, your roof will develop issues like roof leaks, shingles littering, and gutters rusting. The damages might be due to the growth of lichen and moss, or missing granules on the roof shingles edges. The problem is that you may not notice a roof problem on time and the issues may cause severe damages to the roof. Even worse, this can lead to compromises in the structural integrity of your house.

The cost of repairing or replacing roofs in such situations is very high. This is where roof insurance comes in. The insurance company provides security and safety against any sudden damage or destruction that you are unable to shoulder. But always remember that you are only covered as per the terms in the policy you signed. So, how do you get a new roof from your insurance?

Understand Your Roof Problems and Their Causes

The journey starts by identifying the problem with your roof and the cause of the problem. You should always take preventive measures on your roof to avoid major damages. Carry a roof inspection at least twice a year without fail. This way, you avoid high fixation costs or even total replacement costs. On the same, you will avoid colliding with your roof insurance company for being negligent.

Damaged Roof Flashing

These are steel or aluminum galvanized sheets installed beneath the shingles. They run over the joints of your roof to protect its internal structures from water damage. Damage is most common along the roof joints. This includes around the vents penetrating the roof, skylights, and chimneys.

You know your home has a torn roof flashing when water leaks in your house, you spot rust on flashing, the roof starts sagging or buckling.

Fascia Board

Roof Hail Damage

Hail damage is yet another sign of roof damage that is hard to spot. How do you identify hail damage on your roof?

  • You see cracks on your roof shingles
  • Shingles have broken granules or are missing
  • It has roof punctures
  • It has circular cracks – may be marks of large hails
  • Dents on the roof or windows – as a result of hail hitting
  • Your roof has a clogged gutter system

All these are likely to cause damage to the or even the tiles, which eventually cause water leakages.

Roof Water Damage

Your shingles suffer hits from hails which cause all manner of damages. Shingles may break, crack, or shift positions if the wind is involved. As a result, you’ll experience water leaks to the inside of your roof. This later translates into stains on your ceiling and weakening of the internal structure of the roof, which will demand its replacement.

When water gets into the inside of your home, you’ll start experiencing the growth of stuff like molds, fungus infections, moss, mildew, rot, and decay.

Roof Fungus Damage

Rooftops that experience humid weather for long periods will be affected by fungus damage especially if the drainage is not good. They may develop molds, algae, and moss on your rooftops. Here are some of the signs your roof has fungus damage:

  • Black green speckles – algae
  • Green cover that has a fuzzy texture – moss
  • Either black, pink, or grey powder – mildew
  • Brown, dark-green or black blotches – mold

Fungus might look harmless to your roof at first but leads to significant damage with time. They eat up the roof material or weigh it down, causing water leaks that will make your roof even weaker.

Roof Wind Damage

Strong winds destroy weak roofs. You will hardly notice wind damage unless it’s massive destruction.

The following, among other issues, are a sign that wind is damaging your roof:

  • Damaged gutters
  • Loose, broken, or even missing shingles
  • Heaped debris on your rooftop
  • Damaged fascia
  • Torn tiles

If you note any of these or other types of roof damage, you can first revisit your roof policy terms. See if it covers you from the damage or destruction caused.

Reasons Your Roof Claim May Be Denied

Not every insurance claim goes through. Your insurer may fail to compensate you for reasons like:

Age of Your Roof

If the damage to your roof results from neglect or wear and tear, most insurers won’t renew your policy. They term it as your general maintenance responsibility. Also, your insurer may not cover old roofs, especially those over 20 years old. They usually have limited coverage, if any. In this regard, insurers first inspect your house before it renews a policy.

In short, your insurance company won’t give you a better roof than what you have. If you had a wood shakes roof, you would not get a clay, concrete, or slate roof. Your insurer will cover your roof only if the act of nature or sudden accident caused it. All the same, a reputable insurer should explain all their policy terms before you sign for a cover.

The Location of Your House

The location of your house has a significant impact on your policy terms. It is an insurance cost determinant, and whether you can insure it at all.

For example, if you live in an area prone to disasters, an insurance company may avoid renewing your policy. It includes areas with tropical storms, hurricanes, and wildfires.

In turn, your insurer may reflect by charging more for its premium.

Other reasons your claim may fail include:

  • If you pay several claims for the same roof
  • In case you do not disclose the existing damage before signing the dotted line
  • If you have acted fraudulent, that is, giving the wrong value of your roof

Generally, the location you dwell in may affect the terms of policy. It will also determine whether an insurer will renew your policy or not. So, it will be better to understand what a given policy covers.

Understand Your Roof Policy Terms

When you sign up for an insurance cover, that’s what you’ll get during your claim. Insurance agencies offer two roof insurance types which are:

  • Repair insurance – the cover partly covers a particular percentage of damage caused to your roof
  • Replacement coverage – this type covers the total replacement of your roof. That is, in case the damage caused is unfixable, they pay for a roof replacement.

Of these two, replacement coverage is the most comprehensive. It will cover the cost of a completely new roof. Thus, it is quite expensive. More so, it involves more paperwork than the repair cover. Thus the reason it is hard to get it accepted. Have you been paying for repair or replacement cover?

Before you file a roof insurance claim, you should first revisit its terms. If you have a bothering issue with your coverage, consult your insurance agent.

Document the Roofing Claim and Call Your Insurer

When you want to claim insurance for your roof, ensure all your documentation and paperwork are in order. Here are some of the things you need to do.

Collect all the Possible Evidence

Here, you need to collect a lot of data. You will have to take lots of photos, both in the exterior and in the interior of your roof. Your goal here is to cover every scene to make your claims smooth and straightforward.

Dates are also crucial as most insurers need that you submit your claim within a given timeframe. Most agencies will ask you to file claims within 15 days from the day the event occurred. In other words, it is safer to know your insurance agencies’ protocols. When you know what to do, you avoid claim denial.

Write an Explanation of Needed Repairs

If possible, get your explanation from a professional like your roofing contractor. It helps confirm your roof insurance claim.

Call your insurer

Your insurer will at this point appoint a claim adjuster to come and inspect your roof damage. After inputting data, the adjuster will come up with your roof value. This will determine what your policy will cover. Your roofing contractor will go with the adjuster as your eye.

Hire a Reputable Roofing Company – Get a New Roof

Once you file all the necessary documents and are through, you can now have your roof replaced. For roof repair or replacement, you should hire a reputable contractor well known for roof repairs, Installation, and Replacement. You should also hire one who has worked with roofing insurance before and has a good track record. A professional roof company will not just give you a good experience but will save you the hassle that comes with such a project. Contact us at Tornado Roofing for the best service.

How to Claim a New Roof from Insurance: FAQs

How do insurance claims work for roofs?

The older the roof gets, the higher its value depreciates. Thus, your insurer will cover the actual value of your roof when wear and tear occurs. You should, though, confirm with your insurance company.

Should I call an insurance company or roofer first?

First, call your roofing contractor to first assess your roof’s damages. Your contractor will help you follow up on the work of the insurance adjuster.

What do roof adjusters look for on roofs?

Roof adjusters look for:

  • The age of your roof
  • Whether all appliances are well installed damaged or have missing shingles
  • Whether your contractor installed your roof well

From his data, the insurance company will know what it should cover.

Still Don’t Know How to Go About Roof Insurance?

The journey to get a new roof from an insurance company is hectic, but in your case, it shouldn’t. All you need is the understanding of the policy you signed, documenting every detail required, and approaching your insurer with facts and within time. In this guide, you learned how roof insurance works, including roof issues and their causes, and how insurance helps, the differences between repair coverage and replacement coverage, how to handle roofing insurance paperwork. Feel free to reach out to us at Tornado Roofing to make everything clearer.

Get A Free Roofing Estimate Now!

By |2022-01-10T07:24:33+00:00March 30th, 2021|Blog, Roof Repair|0 Comments

Types of Fascia Board Materials and Their Advantages

Whether you are installing a new roof or want to replace an existing one, the question of “slope” will always arise. You have to figure out which style of roof is suitable for your home, what benefits it has to offer, and the challenges it might pose during installation and in the future. Knowing this helps you choose the right roofing material and contractor.

Tornado Roofing and Contracting has taken care of low slope roofs in the Florida area for the past three decades. We understand the fact that choosing a roof is not just about aesthetics and costs, which can be confusing to some property owners. The good news is that our crew is always willing to educate you on everything about roof styles, slopes, materials, and anything else roofing. In this article, we help you understand re-roofing low-sloped roofs.

Get A Free Roofing Estimate Now!

Wood Fascia Boards

Wood fascia boards are the most common of all fascia board materials because they are cost-effective to buy and install. They could be anything from fir, pine, or spruce. Wood is susceptible to rot when exposed to water. But there is a solution to this through finishing and regular painting. Most homeowners also agree that wood is versatile as a decorative material for fascias than any other material on our list. Cedar fascia boards have recently become an attractive choice for homeowners looking for rustic appearances, and the fact that it’s water-resistant is a big plus. They become even more durable when stained.

The biggest disadvantage with wood fascias is the continuous maintenance and repair costs. You have to periodically prime and paint the boards to keep them in top shape. Replacing fascia boards is an urgent exercise immediately you sport damages and includes removing gutters as well, which increases the costs.

Aluminum Fascia Boards

If you are looking for an upgrade from the common wood fascia boards, then aluminum is the next solution. The biggest positive about this material is its longevity. They are resistant to water and responds well to weather variations. They are often used alongside wood fascias to weatherproof them. The Tornado Roofing teams bend and reshape aluminum to wrap wood fascia.

Aluminum fascia boards are very easy to install thanks to their easy-to-cut and lightweight nature. Unlike wood, they are also maintenance-free. When it comes to aesthetics, you can get them in a wide range of colors to suit the theme of any home. If you are able, buy thicker aluminum to avoid easy denting.

Their drawback is in the initial price. But you can compensate for this, in the long run, thanks to their low maintenance costs. Though durable, they still get scratches and marks during heavy storms. Then if they are installed with steel nails, they might react and lead to rot which will force you to call for repairs.

Fascia Board

Vinyl Fascia Boards

Vinyl is another material you might want as your fascia because it’s durable and easy to install. They don’t rust or rot. Financially, they save you more than wood boards owing to their lower maintenance costs. So even though you’ll spend more during installation than wood to install vinyl, you save in the long term because they require minimal maintenance work. If you must repair vinyl, you’ll still spend less than aluminum and wood. While they can discolor when exposed to sun rays, vinyl boards only require spraying and wiping down to get them back to shape.

You can get vinyl in any color you choose. Most importantly, vinyl fascia boards come in kits ready to install and they are readily available in local stores.

The biggest undoing for vinyl fascia boards is their response to weather condition variations. They expand and contract drastically to respond to the heat changes in the environment. A good roofer will ensure they use the J and F channel during installation to curb this issue. They must also seal every joint tightly to prevent moisture from penetrating into the inside of your home. And to avoid fading during exposure to the UV rays, we seal vinyl fascias.

Composite Fascia Boards

If you are looking for an eco-friendly fascia material, then composite will work great for you. Composite is a combination of several materials including plastic, wood chips, and dust held together using epoxy resin. These boards are cut and installed just like wood boards. But they are resistant to rot and very durable compared to other solutions. And all along, they require minimal maintenance.

If composite fascia boards get damaged for some reason, they are very difficult to repair. It’s impossible to refinish this board material as well. Their price is also very high compared to other fascia board materials (except aluminum) that’s why they are not as common as other materials on this list.

Why Get a Roofing Expert for Your Fascia Board Installation?

Installing fascia boards is an easy task that can be tempting for some people to climb their roofs and do the job on their own. But before you do this, you should know that it’s equally a challenging task. Removing the existing fascias can easily damage your roof if you don’t know what you are doing. Besides, there is no one simple way to install all types of fascia materials. Individual material has its own way of being installed.

Hiring an expert who is aware of all these types of fascia materials and understands the best way to install them is the way to go. With a professional handling your job, you don’t have to worry about accidents on your property. Even if it happens, the contractor is insured. Above everything else, you get quality results that will last to the maximum.

Reliable Fascia Installation and Replacement by Tornado Roofing

Fascia boards, even though not visible in most homes, are very important installations as part of your roof. You therefore need to install them using the best material you can afford. Once they are up and functioning, you want to regularly inspect them alongside your roof to make sure they are working as they should. Whether you want to install new fascia boards or need to replace worn-out fascias, you should contact a professional roofer to do the job. Reach out to us at Tornado Roofing for quality craftsmanship.

Get A Free Roofing Estimate Now!

By |2022-01-10T07:24:33+00:00February 23rd, 2021|Blog, Roof Repair|0 Comments

Types of metal roofs

When you choose a metal roof, you stand to benefit more than a homeowner installing the regular asphalt shingles. The costs could be high but the benefits are way more than you could imagine. The term “metal roof” is not just a single product you buy and install on your home, it applies to a whole range of metal roofing options that you can choose from. And each of these, if installed by a professional roofer, come with advantages you would not get from any other roofing option.

  • Aluminum is long-lasting and doesn’t corrode with salt moisture
  • Copper is hardwearing, soft, and has a low melting temperature
  • Steel comes in three; galvalume, galvanized, and weathering (Corten) steel, and all are very durable
  • Tin though no longer commonly a metal roof option in modern times, it’s still an extremely long-lasting material if you decide to use it on your home
  • Zinc is the metal roof with the lowest melting point, is very durable, and resistant to corrosion as well.

In this article, we show you the types of metal roofs and why you should choose either of them to roof your property.

Get A Free Roofing Estimate Now!

Aluminum Metal Roofing

Aluminum is one of the most common metal roofing across the United States. You’ll see it on both residential and commercial property. Those who have installed it agree that it’s a reliable option and it’s in a variety of designs that make each home unique. Longevity is perhaps the biggest benefit of this roofing product. You can enjoy more than three decades out of a single installation. If you live in the coastal regions along the Atlantic like most Florida homes, then aluminum is the ideal choice. Even in such corrosive environments, this metal roof still doesn’t rust easily.

On the other hand, the prices can be prohibitive for most people. Their installation costs can range anywhere from $15,500 to 28,000, which makes aluminum one of the most costly options you’ll find on the market. If you are looking for minimal labor costs, contact us at Tornado Roofing to get the best deals in the roofing world.

Copper Metal Roofing

Copper has been used as a roofing material for centuries and remains to be a top choice for most property owners. Unlike aluminum that lasts for three decades, copper can hit 200+ years in the right environment. You’ll literarily forget about replacing your metal roof if you choose a copper metal roofing material. The icing on the cake is that they are 100% recyclable so your material won’t go to waste when your generations need to replace the roof.

While metal roofs are known for their noise, copper sings a different tune. Because of its soft nature, its noise is very minimal. With modern insulated roofing, you’ll barely hear any noise from this roofing product. Plus, it cannot be punctured like other metal roofs when strong hail hits.

Ironically, the downfall of copper lies in its softness. If your area is prone to hailstones, your roof will easily get dents whenever it rains. And this will lower the beauty of your home. Also, you must get an expert copper roofer to install your roof because this roofing material expands and contracts with weather changes. This requires proper paneling to get this tendency under control. Another disadvantage is their extremely costly installation. A full installation can cost between $23,000 and $48,000, which is way above other roofing options.

Steel Metal Roofing

Steel comes in three options; galvanized steel, galvalume steel, and weathering steel. This is so because steel is an alloy of iron and other elements that rust when exposed to moisture. The steel metal is covered with a coat of another metal to help manage the corrosion.

  • Galvanized steel is the most common residential metal roofing steel you’ll see around. It has a zinc coating that helps to slow down corrosion and extend the life of your roof.
  • Galvalume steel has no big difference from the galvanized steel. Instead of a zinc coating, it has a combination of zinc and aluminum as the coating. With aluminum as part of the sheeting, you get a more uniform looking product with reduced sparkle. The aluminum also protects the surface better against corrosion but it’ll be easier to scratch and cut.
  • Weathering steel is not a common roofing product because its original intent was for heavy steel construction. Instead of zinc or aluminum as the outer coating, it uses steel which is intentionally put there to rust and protect the inner layer of steel. So if you are going to use weathering steel as a roofing product, you should be prepared to regularly maintain it. You can use it as an accent roofing solution.

Advancements in roofing technology make roofing with steel a great option. You can use a special type of paint to mimic other roofing products. Steel is a flexible roofing product, allowing you to use it as you deem right. Like copper, steel is also recyclable, making it an ideal choice for those who are eco-conscious. And because they are readily available, the installation costs are also lower compared to other metal roofing materials.

Steel roofs are very durable and can withstand hail and harsh weather conditions, including heavy winds. That’s why they are common in mountain areas with high snowing. When it comes to buying costs, you can get steel at $3 per square foot. With proper installation, you can reduce your cooling costs by up to 25%.

Tin Metal Roofing

You probably know tin as a canning material if you have been around long enough. You might never see tin as a roofing product in the US cities but roofers in rural America have attempted to roof with it. They take the cans and flatten them into sheets that they then use as a roofing product. But since aluminum has replaced tin in the canning world, it’s becoming rare and roofers can only imagine its possible application in the future.

Zinc Metal Roofing

Unlike tin, zinc is a common metal roofing product. The reason zinc is loved so much is its ability to be shaped and designed as the installer wishes. Besides, it possesses unique self-healing properties that allow it to get back to shape after scratches and damage. That is a save on repair costs in the long run if you install zinc. In addition, this metal roof is resistant to corrosion and so won’t rust over time. As if that’s not enough, zinc is also highly recyclable, making it an eco-friendly roofing option.

How long can a zinc roof last? 100 years or more. All this time yet low maintenance needs, zinc roofing material is a win for any property owner. So why is it not on most homes when it has all these benefits? The cost could be the reason. It’s the second most expensive metal roofing material on our list after copper. You’ll have to spend at least $1000 per square foot of roofing with zinc.

Zinc is readily available because the production process is less hectic compared to copper and aluminum. It’s also soft. This feature also contributes to its disadvantage because it damages easily during hailstones. If you are considering installing a zinc metal roof, it’d be better if you consult with a roofing expert to inform you how well zinc roofs perform

Get A Free Roofing Estimate Now!

Tornado Roofing Offers Quality Metal Roof Installations

If you are choosing from a metal roof or shingle roof for your property, you want it properly installed to enjoy all the benefits metal roofing can offer. You’ll need to choose among the types of metal roofing. You also want to save a few dollars during your installation and you can only achieve this if you have an understanding contractor for your project. Tornado Roofing experts provide quality installations with your needs in check. You can count on us for excellence and cost-effectiveness. Reach out now to get a free quotation for our metal roof services.

By |2022-01-10T07:24:33+00:00February 18th, 2021|Blog, Roof Repair|0 Comments

How to Make the Right Repairs for Your Flat Roof

We recently got a call from a client at Tornado Roofing Co offices.

“Hey there! I just realized my ceiling in the living room has softened and looks like it’s bulging. When I stood on a stool to touch it, my finger left a mark there. Does that mean my roof is leaking?” he asked hysterically.

Situations like this happen when either the plumbing system is broken or the roof is leaking. So his guess could be right or wrong. We scheduled a checkup meeting later that day and one of our crew members visited his home. Our expert ruled out the plumbing problem because the plumbing system wasn’t passing anywhere near the living room ceiling. In fact, no water pipe was running anywhere in the roof deck. And given that it was a rainy season, his flat roof could be having a crack, a hole, or any other leak issue that was causing the problem.

Get A Free Roofing Estimate Now!

What Could Go Wrong With a Leaking Flat Roof

Fortunately, discovering a roof leak on a flat roof is easier and quicker compared to other roofing designs. A professional is able to identify the issue and the extent of the damage. Our client’s roof had a hole at one end of the roofing material. It was leaking but not at the point he was seeing wetness on the ceiling of his living room.

Water was traveling across the roof membrane right above one of the bedrooms, through the roof deck then dripped on the living room ceiling. It was a small hole problem that would not cause any issue on a normal day but the heavy rains made its effects visible. Thankfully, our client’s quick response arrested the issue on time and he wasn’t going to spend a fortune to repair his roof.

If he had decided to ignore the leak, water would seep through his wooden roofing frames and ceiling to cause rot over time. This would compromise the integrity of the entire roof structure, requiring him to install a new one.

When you decide to diagnose a leaking issue in your home, partner with experienced contractors who are able to identify the source of the problem for a better repair approach.

Sometimes roof leak problems are easy to solve because all they require is patching with adhesives. That was the case with our client. Sometimes roof issues are complicated and need replacements of the components. While all roof leaks are problematic, a leaky flat roof comes with a specific set of challenges that if not treated carefully can worsen the situation.

Common Roof Materials and What you Need to Repair Successfully

The type of roof materials and tools you’ll need depends on the type of damage your roof has and the type of roofing materials in use. Also, the age and the existing condition of your roof must be a consideration when you want to make repairs. Some of the most common roofing materials for flat roofs include:

Rubber (EPDM)

Most flat roof Florida homes and around the United States use rubber. Its components include propylene and ethylene like in tires. This roofing system is easy to repair and can give service for 10 to 15 years. Some of the common problems you’d expect from EPDM roofs include:

  • Cuts and holes resulting from impact or vandalism
  • Shrinking of the edges which detach from the walls of the house
  • Poor detailing of the joints or flashings

Modified Bitumen

Modified Bitumen roofing is a combination of asphalt, solvents, and a variety of rubber. This roofing material type is applied using an open flame. You can enjoy its value for more than three decades. Some of the common problems that this roof type encounters include:

  • Blistering because of rough weather
  • Cracking, wrinkling, and splitting
  • Shrinking and sagging

BUR (Built-up Roofing)

Also known as roofing tar and gravel this roofing material is made using fabric and bitumen. This material can last for about 30 years. The most common issue with BUR is:

  • Cracking

TPO Roofing 

TPO Roofing results from a combination of ethylene-propylene rubber and polypropylene. The roofing type is mechanically attached together with a reflective membrane during roofing. Some of the issues to expect include:

  • Blistering
  • Chipping

Concrete

Though concrete roofing is not an attractive roofing option for most homeowners because it requires waterproofing, it’s still one of the most durable and easy to repair. Some of the common problems you’d expect from concrete include:

  • Cracking
  • Surface wear

PVC Roofing

As the name suggests, its composition is layers of PVC roof materials attached together with polyester plus other additives between the two. The additives make the material durable, capable of handling UV rays, and adds flexibility to the roofing material.

All these roofing materials can be repaired when they get damaged in one way or another. All you need is the right materials, tools, and roofing skills. Here are some of the common tools and materials you’ll need for the repair work.

  • A hard bristled brush to clean the roof before you repair it
  • A rag or towel to dry your roof after cleaning
  • A utility knife to slice blistered spots and cut out repair areas on your roof
  • A trowel to even and smoothen the floor surfaces during repair
  • Roofing cement
  • Fiberglass mesh to reinforce and waterproof the repairs
  • Gravel to absorb UV rays after repair
  • Reflective floor coating to protect against sun damage
  • A paintbrush
  • Roof patches (Some roof patches come with sticky backs which can save your roofing cement)
  • Caulk for sealing cracks
  • A pair of scissors to cut roof patches
  • A roller stick to spread solutions over your roof
  • Stirring stick to mix your repair solutions

Method 1: Flat Roof Repair

Diagnosing a Flat Roof Damage

You should first measure how far the roof leak is from the two closest walls. You do this by identifying your wet or stained ceiling. Sometimes it’s a smell of dampness during the rainy season. Then measure the distance from the stain to the nearest walls using a tape measure. Climb up your roof and use the same measurements to identify the damaged part of the roof. The damage is most likely within the measurements you got or anywhere close.

But keep in mind that it’s possible that the damaged part of the roof is far from within your measurements. The reason is that not all flat roofs are perfectly flat. This feature is allowed to let water to flow. Like in the case of our client above, damage can happen at the highest point of the roof then lets in water to flow to the lowest part of your home (where you see the problem).

Examine the Slope

When you get on top of the roof surface and identify the position of the damage, examine the slope. The problem might be a crack, a tear, a puncture, or a missing part of the roof. Find out how it’s possible for the leak to penetrate the roof structure to reach the ceilings below. If your roof has been around for many years, you might realize there are multiple damaged spots. In this case, classify the issues so that you have problems you can tend to immediately and those that can wait. Whatever is letting in water is an emergency whether big or small.

If the Roof Looks Fine…

Check the seams. The sides of your roof may be the source of the leak. So go around the edge of the roof to identify any weaknesses. You might notice leak problems where the walls attach with the roof, around the vents, or chimneys. There could also be a problem with the water repellents, metal flashing strips.

Clean the Damage

Now that you know what the problem is, it’s time to prepare the place for repairs. A dirty surface makes it hard to get quality results when you decide to repair the damage the repair material might not bond properly. Also, cleaning the area provides the opportunity to see the problem better. So clean the damaged area by removing the debris, dirt, gravel, and stagnant water. A tough-bristled broom and a mop will come in handy for this purpose.

After cleaning, dry the target area using a piece of cloth or towel. While you can use mechanical ways to dry your roof, it’s better to let it dry on its own for a day or two. Then use a sealant, roofing caulk, or cement to cover it. Ensure you press your repair material so it reaches every corner of the damage, then level it so it’s even with the rest of the roofing surface.

Method 2: How to Seal Small Cracks and Holes

If you realize your roof has blisters, that’s as a result of trapped moisture and overheating. Pop these swollen or blistered parts on your flat roof using a utility knife. Ensure the cut is shallow so you don’t puncture the roof material. Then scrape off any protruding roofing material and throw it away. If it feels wet, wipe the area using a rag until it’s dry before applying a sealant.

In some instances, forcing a sealant on these areas can be difficult requiring you to create a shallow “pothole” for the sealant to stick. So take your knife and curve a shallow cut as you remove the material around the area. Alternatively, cut narrow strips on the damaged spot so it’s capable of holding and bonding with the sealing material. Again, be careful not to slice through the roof material.

Apply a Coat of Roofing Cement

Fill the section you’ve cut out on the roof with a layer of roofing cement. Push the cement into the carve then level it so that it evens the rest of the roof. Cover about 15 cm wider than the damaged area. If the holes or damage is 2.5 cm or less, seal it using caulk. Afterward, take a piece of fiberglass mesh and cover the patch to waterproof it. Make sure the mesh is holding down onto the cement by tapping and pressing it in place.

Open up your can of roofing cement again and cover the fiberglass mesh. This should be thick enough to hide the mesh underneath it. Then use a trowel to smoothen the surface. Don’t leave your repair as it is because UV rays might destroy it by breaking the chemical bonds holding everything in place. Take ballast and spread it over the cement patch then use your trowel to spread it over evenly and to cover all the cement patch. This absorbs UV rays to allow the repair to last longer.

Another important ingredient you shouldn’t forget is applying a layer of a reflective coating. As the name suggests, it will help reflect the sun rays that can break down the chemical bonds in the cement.

Method 3: Using a Roof Repair Kit

You can buy a roof repair kit that contains everything necessary to patch your roof damages. Most kits contain patches that help solve leaking problems from larger surfaces and caulk for sealing cracks and small holes. With a kit, you have everything you need to successfully repair your roof. Make sure you compare the color of the patches with that of your roof color.

Use your utility knife to cut out the damaged area, removing any loose particles, dirt, and grime. You can cut into the roofing membrane as deep as two and a half centimeters. If the damaged roofing material isn’t removed, you can still go deeper but make sure you don’t puncture the lower layers of your roof.

Fill the Damage on the Flat Roof With a Layer of Roofing Cement

Shop a can of roofing cement (make sure it’s labeled for the type of roofing you have to effectively repair the damage). Then spread the appropriate amount of the cement on the damaged area so it doesn’t overflow or is too little. Use a trowel to press it in the damage as well as make a smooth surface, even to the rest of the roof. You want to apply cement around the damage for about 5 centimeters from the damaged section.

Cut a patch that is slightly wider than the area you are repairing. Then take and place it on your freshly spread roofing cement. Press the patch to make sure it sticks. If necessary, cut the patch so it’s the right size to the area covered with cement. After the patch, cover your repair work with a layer of roofing cement. Make sure this coat covers past the patch. Then smoothen it so it’s at the same level as the rest of the floor surface.

To ensure the surface is not exposed to water damage, add another patch to the area you are working on. This time, the patch should also be slightly longer and wider than what you’ve already laid on the floor. You might realize the repair work more protruding this time considering that the last repair layers were leveling the rest of the roof. While it might affect the aesthetics of your roof, it’s a move that makes your work more long-lasting. The good part is that most flat roofs are not visible to the public. The protruding part won’t be a big problem.

Just like before, press this patch on the roofing cement surface so it sticks. Try and make it level your roof surfaces as much as you can. The edges must bond with your roof material to prevent water damage and moisture from penetrating the patch. So get your roofing cement, add it around the edges (while they are dry) then press the edges of the patch to attach it to the roof.

It’s now time to add the final layer of roofing cement. Scoop it and add a thin coat to the patch. Try as much as possible to make the layer even to the roof materials. Then protect the surface from UV rays that can potentially break the chemical bonds in your patch by adding ballast to the repair mark. Alternatively, find a reflective coating material and apply it to your patch to protect against sun damage.

Method 4: Resealing Your Entire Roof

Clean the Roof

Resealing your roof is the option you go with if there is too much damage to your roof. You begin the process of cleaning the roof surface. Use a hard-bristled broom and clean away debris, dust, and clear all the damaged surfaces. Dispose off the dirt according to your local government requirements. Roofing contractors already understand this that’s why you should involve a roofing company from the onset of your repair project.

Apply a Bitumen Primer

Get ready with a paint roller, then pour a generous amount of bitumen primer on the roof surface from one of the corners. Use your paint roller to spread the primer on the surface. Ensure your spread is even, about 1 cm thick. Coat the roof surface neatly from one end to the other. Add another pour of the bitumen primer when the initial one depletes until you cover the whole roof.

After you’ve successfully spread a coat of bitumen primer on the roof surface, give it time to dry. Not less than 20 minutes. The drying time might take longer during cold seasons. Also, read the manufacturer’s drying recommendations to be sure your bitumen primer coat dries properly. Try the primer after the dry time is over by using your finger to be sure it’s properly dry. If you use a bitumen primer that’s not set, expect the sealant not to bond with it properly, which will result in poor quality work.

Layer Your Dry Primer With a Sealant

Mix your sealant to create a smooth semi-liquid substance. Use a mixing stick to stir through the can so that its components mix properly the solid part will rise from the bottom to mix with the liquid part. It should be easy to pour and spread across the roof surface.

Then just like you did in the first step, begin by pouring it in one corner of the roof then use a paintbrush to spread it evenly as you move to the other end of the roof. It’s important to work in one direction so your work is smooth and about 1 inch thick all around.

Lay a Fiberglass Mesh Over the Wet Sealant

You can get fiberglass mesh in big rolls. So measure your roof and buy one that fits well. But be careful the size you buy because carrying the mesh up the roof can be an uphill task, literary. If you already bought a big mesh that is making it hard to take to the roof, ask for help from a friend or cut it into manageable bits. When you get it up there, use a pair of scissors to cut its edges so that it fits on the roof accordingly. Clamp one end of the fiberglass mesh to allow you to spread it effortlessly.

Unroll the mesh over the wet sealant if it’s in a roll or unfold it if it’s folded. Use any weights you can find around you to secure the mesh flat on the roof as you cover your surfaces with it. By the end of it, let the mesh be at the same level as the roof surface without bumps or uneven spots.

Cover the Mesh With Another Sealant Coat

Once your fiberglass mesh is in position, take your sealant and brush it over the mesh. This should be another half an inch of sealant coat. Doing this not only holds the mesh in position but also completely seals out moisture in the future. You can let the mesh overlap your roof surfaces for about 2 inches.

Depending on the size of your home, do this process severally until you cover the entire roof. Finally, let your work dry for the next 12 hours. If possible, let it stay for a few days before you can apply another coat of sealant. If you think the roof is dry enough, it’s time to spread your sealant. Then give it time to dry and check your work afterward.

You will notice dark patches and small holes which indicate that the specific sections are not waterproof. So, seal these isolated marks as well as fill the holes. Then spread another layer of sealer all over the roof, half an inch thick.

Add a Reflective Coating

A reflective coating ensures that your work is protected from the sun’s rays. If you leave your roof exposed, UV rays hit it to break down the chemical bonds. So open a can of reflective coating and stir it using a stick to make an even paste. Get a paintbrush to help you reach the hard-to-reach areas of the roof with the reflective coating. Then take a paint roller to quickly spread a layer of reflective coating on the rest of the roof. Ensure your work is even and smooth all around the roof.

You could choose to use rocks or ballast which absorb the UV rays instead of reflecting them away. Your reflective coating might take more than eight hours to dry depending on the weather conditions.

When to Replace Your Flat Roof instead of Repair

Roof repairs are temporary precautions that can help you stay dry in your home but not for long. You’ll realize you have to do regular repairs to the roof over and over as the damage becomes worse. If your flat roof needs complete resealing now, then chances are that it will need replacing soon. So, as you repair it, make arrangements to have it replaced within the coming few months.

Ideally, flat roofs should last for more than two decades. That’s if they are properly installed and the proper regular maintenance is done. Over time, the materials then start to break down and disintegrate. You might start seeing roof leaks when the roof is about 12 years old or more. If you suspect that your roof damages are a result of age and disintegration, repairs will not do much to protect it. Just consider replacing it as s

A single damage to your roof might give you a few months of service, but when there are several leaks, it makes economic sense to replace it soon. The situation can be worse if the initial installation wasn’t done properly.

Comparing the cost of repairs and replacing your roof is another important thing to do when a roof problem situation occurs. You need to add up the material costs and contractor charges. When a roof repair takes as much money as installing a new one, then it’s better if you replaced it. Consult a professional roofer to compare the costs in light of the condition of your home.

Sometimes even a roofing expert is not able to rescue your roof through repairs. The sooner you know your roof’s limit the quicker you will repair it and save yourself the hassle and loss of money.

When to Stop Wasting Money and Time on Roof Repairs

Some roof surfaces look good on the surface but their deck has been weakened over time. In such instances, you are better off replacing your roof than repairing it. It doesn’t matter what the roof surface looks like when the deck is in bad condition.

If the deck is bad, you will notice dips and hollows on the roof surfaces, especially on roofs with timber as their structure and bitumen materials that have lost elasticity.

Sometimes a professional will climb up there to assess the situation. They must be very careful when walking up there.

How to Maintain Your Flat Roof After a Repair Job

We encourage you to invest in a sealer after successfully repairing your roof. It might raise the repair costs but worth the investment. If you properly apply a sealer on your roof, maintaining it becomes easier. All it will demand from you is to regularly clean the dust and debris from the gutters and surface. Also monitor if the flashing is working properly.

Schedule overhaul cleaning every time a storm happens or after every six months. If trees surround your home, you want to make periodic cleaning at least after three months. And considering that flat roofs accumulate leaves faster, which later rot as they collect moisture, keep an eye on your roof anytime you have a chance then clean it.

Whenever you notice a crack, make sure you seal it with caulk immediately. Also replace the flashing pieces to prevent leakages.

The Cost of Flat Roof Repairs and Replacements

The costs of roof installations, repairs, and replacements vary in a big way depending on the materials involved. EPDM, TPO, and PVC roofing materials are costly to repair and replace even without including the contractor costs. The strange bit about flat roofs is that they cost higher to repair if you compare to other roofing designs. This happens because they take longer to repair and requires double the effort you’d put on a sloping roof.

A contractor will charge you according to the current condition of your roof and the work they anticipate doing. The material type will play a big role in determining how much you’ll use. For materials and labor charges, this could be anywhere between $4 and $9. So if you have a 1000 square foot building, you might need to part with between $4,000 to $9,000.

Some of the costs that most people don’t expect include the dirt removal fees and the disposal charges as well. Including ventilation, roof drains, and extra underlayment also raises the costs.

Also, expect commercial flat roofs to have a slightly higher cost to repair and replace. The reason is that most materials used to roof commercial buildings are expensive.

Contact Roofing Professionals at Tornado Roofing Co for Flat Roof Repairs

Going up a ladder onto your roof, identifying the problem, and doing a perfect roof repair job is not as easy as many homeowners would wish. There’s a lot that could go wrong if you decide to do this by yourself. It’s always better to contact a professional roofer to help you do the roof repairs and get quality results. Tornado Roofing Co is your partner when it comes to all your roofing needs. We are affordable and provide quality results on all our roofing projects. We are only a phone call away.

Get A Free Roofing Estimate Now!

Tornado Roofing Your Best Florida Roofing Company

Regardless of the roofing system you choose, you want it to be installed properly by an expert roofer. That way, you enjoy the full value of your investment. At Tornado Roofing, we give free quotations on roofs for all types of buildings and do the best installation to achieve durable and visually pleasing results. If you need to install a metal roof on your home or business premises in Florida, reach out to us.

By |2022-01-10T07:24:34+00:00February 17th, 2021|Blog, Roof Repair|0 Comments

Identifying and Dealing with Hail Roof Damage

Repairing damaged property after a hailstorm can be very costly especially if you ignore the damage the first time it occurs. The best approach is always to inspect and repair your roof damages immediately after a hail storm. That way, you avoid the subsequent roof problems which eventually saves you a lot of money. 

Those who ignore repairs no matter how small the damage might look, allow it to worsen over time. An unrepaired roof can lead to serious secondary problems like leaks or even wood rot. By the end of it, you might need to replace your entire roof which could cost a fortune. A damaged roof further lowers the value of your home.

If you are not skilled enough to identify and deal with hail roof damage, you should contact roofing experts in your locality to help with the situation.

Get A Free Roofing Estimate Now!

What Does Hail Damage Do to a Roof?

The damages caused by hailstorms are different depending on the type of roofing material and structure you have, not forgetting how powerful the hailstorm is. Other factors are the age of the material, the direction of the hail, and the surrounding buildings or trees. 

The extent of damage varies from minor damages that are not easily visible to total damage of your roof. They can also be obvious dents and breakages that you can clearly see. The type of hail storm damage on asphalt shingles is different from the hail damage on wood or even metal. Here are the types of damages a hailstorm can cause on your roof:

Dealing with Hail Roof Damage

Loss of Granules

Your roof can lose granules in a rough hailstorm. When a hailstorm hits the asphalt shingle roof, the force knocks off granules from the roofing material. This leaves the asphalt exposed as the granules are washed away. Exposed asphalt is affected by the UV and other elements which make it to age quickly due to the hail storm damage.

Cracks and Tear

Hailstorms hitting the shingles can crack and damage them. The force and pressure from the hailstorm especially when the speed of the wind is high causes tears and even cracks. Cracked or torn shingles cannot perform their function well because they let moisture and sun rays in. A professional roofer can identify such damages and provide the best repairs of the damaged spot.

Wooden-shingle Damage

A hailstorm on a wooden shingle roof can cause extensive damage by splitting the shingles. The damage is mostly random and cannot be easily noticed unless a thorough inspection is performed by a professional roofer. Mostly the damaged shingles will have sharp pointed edges. Once you’ve identified the affected pieces, you have to follow a special procedure to fix or replace them.

Damaged Fiberglass-mat

The impact of the hailstorm on the asphalt shingles roof can be seen by the exposed and damaged fiberglass mat. When the hail hits the surface of the shingles, it exposes the fiberglass mat and this can cause further damage like cracks. This type of damage is not easy to notice. Because of this, hire a professional who is trained and can spot such damages and repair them to help save your roof from further damage.

Hail Damage Roof Inspection Guide

After every hailstorm, it is advisable that you inspect your roof for any hail damage roof signs. Some hail storm damage may seem cosmetic but over time they lead to more serious damages. And as you might know by now, an unrepaired roof can eventually cause stains, mold, and leaks which can be more dangerous for residents and costly to repair. Here are some indicators to show you that your roof has been damaged by a hailstorm and needs repair.

Hail Roof Damage

Check the Gutter

Inspect your gutter to see if you can spot any visible dents caused by the hailstorm. A dent on your gutter is clear evidence of damage on your roof. Also, check to see if your gutter is clogged or if it’s overflowing. A clogged gutter can be caused by knocked off granules that have been swept away by water. If you discover the clog is caused by granules that’s a sign that your roof has been damaged and needs repair.

Check-Siding and Deck

Check for any noticeable damages on the siding and the deck areas. Damages in these areas will show you that there is a chance your roof shingles are torn or cracked and needs fixing. Consult a roofing specialist to help you inspect and make repairs.

A contractor has the technical expertise to accurately assess your roof and recommend the needed repairs. Damages can vary and roof repairs also vary depending on the level of damage. A contractor is able to identify the right repair for your roof, from a simple fix to a complex repair of replacing the entire roof.

Get A Free Roofing Estimate Now!

Tornado Roofing Your Best Team of Roofing Contractors

Tornado Roofing is a reliable roofing contractor for you and offers the best quality services when it comes to roof maintenance, roof repairs, re-roofing, and complete roof replacements. Tornado roofing has been in operation for the past 20 years and has a lot of experience in roofing and quality safety inspection services. If you suspect that your roof has incurred damage during a hailstorm, reach out to us so that we can identify the problems and recommend the best solution for you.

By |2022-01-10T07:24:34+00:00October 16th, 2020|Roof Repair|0 Comments

How to Fix a Leaking Roof From the Inside

You are probably being rained on right now, and that’s why you’re searching for ways to fix your roof from the inside. Good for you because you are in the right place. Fixing roofs can happen in many ways, including doing the project from the inside of your home. If you think this is impossible, contact Tornado Roofing roofing services experts to learn how we can get help. But if you still want to understand the fixing process, here’s your guide.

Call Us Now!

The good thing about repairing your roof from the inside is that you can do it as a solo project, and don’t require a complete set of professional tools to complete the process. Some of the tools you’ll need include:

  • A flashlight
  • Scraper
  • Caulking
  • Nail
  • Gallon Bucket
  • Roof tar (patch)
  • Utility knife
  • Rubber gloves

Here’s How to Fix a Roof From the Inside

It’s worth noting that fixing a roof from the inside is a temporary measure. Once you are done with the fixing, consider getting a professional roof repair or replacement expert to give you a permanent solution. In other words, doing this helps you buy some time for the current rainstorm to pass or get a better roofing solution the following day. All this depends on the age and condition of your roof. So what should you do?

How to Fix a Roof

Access the Attic

You want to get past your ceiling to reach your damaged roof. That means you should remove part of your ceiling and find your way through. The next thing to do is to get rid of any stagnant water. Use sponges or rags. If the water is a lot, drain it into a bucket big enough to accommodate all of it. If the ceiling has seeped water, be careful when moving around it so it doesn’t fall through due to your weight and tools.

Identify the Leak and Seal Them

You want to make sure your work area is dry, and you are in a position to see all the leaks plus remain safe. If it’s during the rainy season, you can identify the leak by the damp places on the ceiling. You might also spot mold or dark patches on the ceiling board. Do this with the help of your flashlight. If it’s daytime, you’ll probably see light penetrate through the holes. Once you’ve spotted the damaged areas, mark them with chalk.

The next step is to ensure the area is dry so that your roof tar can stick. Prepare a proportionate roof tar to the leak and smear it across the damage with a knife. After doing this, place a piece of plywood on the tar and spread more tar around the edges. If you want to reinforce your patch, use rubber on the outside of the leaking area.

Emergency Leaking Roof Fixes When You Don’t See the Leak

In some situations, you won’t see the leak. What do you do? You should try the alternative method, which involves the use of a plastic roof covering from the outside.

Roof Leaks and Repair or Install a New One

Purchase a Roof Plastic

Your local hardware store should have roof plastics. These are specially designed from polyethylene to unfold and cover a leaking roof. You’ll get then in 4-foot rolls from a local vendor or wider alternatives, depending on the size of your roof. What you want is a big enough roll that can cover your roof surface from the ridge to the eave of the affected area. Also, get anchors that will help you position the roof plastic during the installation.

Cut and Install

Measure your roof then cut the roof plastic in a slightly bigger measurement to the roof surface area. Then roll each end of the plastic roof to the anchors by using the utility staple gun to position it tightly. With some help from a partner, lay it on from one end to the other side of your roof. This process will require some guts from you because you’ll have to climb your roof and move around it.

If there’s lightning or a storm, you want to avoid doing the work without professional help. Call experts who have the equipment and knowledge to do it.

Call Us Now!

Naples’ Favorite Residential Roofing Contractor

What if I can’t fix the roof? Roof work can be challenging, particularly if you have little knowledge about what to do. And when risks like lightning and storms are involved, it becomes an impossible mission for some individuals. If you are in such an instance and unable to do the work on your own, contact professional roofers.

Tornado Roofing is your ideal partner in such a situation. Contact us so we can assess the condition of your roof and provide relevant solutions. Here’s how to go about the contractor hiring process. We guarantee quality roof repairs and installations and interestingly low prices for our services. Reach out to us at any time.

By |2022-01-10T07:24:34+00:00September 29th, 2020|Roof Repair, Roof Replacement|0 Comments

How Should I Prepare for a Roof Replacement? 14 Expert Tips

A roof replacement project is a big deal that requires input from both the owner and the roofing company. As the property owner, your part is to prepare the premises before the installers arrive. Once the roofers have come, the property becomes a busy work zone that cannot accommodate multiple activities. So, the preparation ensures that the roofing process is smooth so that everything happens within the set time limits, and everyone comes out safe. 

So, what should you do to prepare for a roof replacement? Here are tips from our experts to help you have seamless roofing experience.

Call Us Now!

Evacuate Everyone Including Pets

Your home is going to be a busy place during the roof installation process. From loud noises to endless traffic, this place will be an uncomfortable place for the elderly, kids, and pets. Expect interruption from your daily schedules and sleeping patterns in the meanwhile. Everyone else needs evacuation because only the workforce has the protective gear to be on site.

Talk to everyone that lives in your home before the roof replacement so they can prepare to evacuate. Children will require some explanation of why they shouldn’t stay or play on the property. If your place is small, find different accommodation to relocate your family during this time. Ideally, send them for a visit to your relatives and friends.

How should I prepare for a roof replacement

Leave the Gate(s) Open

The roofers working on your house will want free access to and out of your compound. Don’t make it difficult for them to ask for keys every time they need to move in or out. Open the gates or give the keys to the project manager to ensure every movement is flawless.

Relocate Your Vehicles

Your contractor needs space to work, and the parking lot is one of those places. That’s where the workforce will be moving, keeping their tools and materials, plus their company truck. Therefore, you need to find temporary parking where your vehicles will be safe. You might want to seal the garage doors to keep the falling roofing debris out.

Remove Wall Decor

Your home will be a beehive of activities during a roof replacement. There’s going to be vibration from machinery, hammering, and movement, which will shake up things a little. So if you have pictures, pieces of art, light fixtures, and any other hanging decor on the walls, remove and secure them in a place they can’t damage. Only leave decorations that are permanently attached to the walls.

Clear Your Furniture

Patio furniture can impede movement during a roofing process. The workers could waste their time moving it from one corner to the other or trip on them, which is an inconvenience. So, move them out of the patio to a shade, garage, or elsewhere. If you don’t have room in your garage, putting the furniture in your yard at a safe distance is good enough for the roofing operations to continue. Remember to cover them so they don’t damage under direct sunlight.

Call Us Now!

Cover Immovable Stuff

Everything needs to be at least 15-feet from the house during a roof replacement. Unfortunately, not all things can move. These could be stuff like gazebos, permanent decor features, kitchen cabinets, among other things. The safe way to deal with such is by covering them with tarps and curtains. So when shingles and building debris fall, they are safe.

Protect Plants and Flowers

If your compound has plants and flowers that you intend to keep, protect them through covering and marking. Use nets and tarps to cover flower beds and mark trees using an orange tape. Doing this will alert the roofers to be careful when working next to these. The best way to ensure care to your plants and flowers is to talk to the project manager about it.

Cut the Grass and Prune Trees

Long grass will hide fallen roofing debris, which might give a hard time to cleaners. Besides, nails could hide in the long grass and pose risks to those who walk through it. So, cut it a day before the construction and clear all the grass to make the debris cleaning easier and thorough. Also, if you have a tree with long branches that hang close to the roof, you want to prune it to give room to the roofers to do their work.

Your Neighbors Need to Know

Your neighbors should be aware of your roofing project before it starts. This way, they’ll understand all the noise, the flying nails, and the debris in their yards. They might need to remove movable stuff, cover their plants, and even give access to their property in case shingles fall in their compound.

Roof replacement

Check the Electricity Connectivity

You don’t want to endanger the lives of roofers. Covering necked wires and removing some of the cables running too close to the roof is great. The roofing company might want to run their equipment using your electricity. In this case, ensure the power outlets are functional to avoid delays.

Antennas and Satellite Dishes are Not Needed

You must remove antennas and satellite dishes from the roof to pave way for the roofers to do their work. If you cannot do it by yourself, contact your cable and satellite provider to remove them for you.

Clear the Attic

If you have stuff in the attic, remove them. In situations they cannot be moved, use covering materials to secure them from dirt. And because most of the debris will gather in the attic, look for ways to lay coverings to make cleaning easier.

Protect the Windows and Fragile Items

If your doors and windows are glass, cover them with boards so they don’t get scratched by falling materials. You also want to secure fragile items like vases, glasses, and plates so they are away from the walls and placed in areas you cannot reach.

Turn Off the Sprinkler System

You should turn off your sprinkler system early enough so the grass isn’t wet during work hours. Doing this helps you avoid wetting the roofing materials as well as protect the workers from showers. If the piping is on the surface and too close to the house, move it away.

Call Us Now!

Call Your Roofing Replacement Services Now

While some roofing installation companies do more than just installing the roof, it’s a good thing to prepare your property before they come. Doing this protects your stuff as well as gives ample time to roofers. The roof replacement will interfere with normal activities, and it helps if everyone in your home and neighbors know it. If you’ve taken prior preparation according to what we’ve discussed above, you can now call your roofing replacement services. Remember that these inconveniences are short-lived, and you’ll soon go back to normal.

By |2022-01-10T07:24:35+00:00July 23rd, 2020|Roof Repair, Roof Replacement|0 Comments

How to Repair Roof Vents

Your attic space holds a lot of heat. In the hotter months, the space between your roof and your ceiling can cause a lot of stress on your air conditioning system. While a handy individual can install or repair a roof vent, some people prefer to hire professionals. Tornado Roofing has years of expertise in a variety of roofing repairs.

Call Us Now!

How Does a Roof Vent Work?

When your crawl space doesn’t have enough airflow, it can trap air and moisture. Inadequate insulation can also encourage decay, mildew, and pests. An air vent in your roof provides airflow and cooling. Combined with quality insulation, air vents can significantly reduce your heating and cooling bills.

What are Plumbing Vent Pipes

Along with the roof vents you may also find that your home likely has a plumbing vent pipe. Similar to the plumbing pipes that move water in and waste out of your home, the plumbing vent runs through your home and out through your roof. The plumbing vent pipe helps to regulate the air pressure in your plumbing, and prevent clogs.

Repair Roof Vents

Roof Vent Damage: Bigger Problems

When a roof vent gets damaged, it can lead to costly repairs. Leaking vents can rot the roof from the inside, and create a dangerous environment for you and your family. If the damage isn’t repaired, it can create irreparable damage. Water is the enemy of building structures. Most building materials aren’t meant to be exposed to standing water. Further, moisture breeds mold, and mildew. 

Repairing a vent can seem expensive, but letting the damage spread could lead to a full roof replacement. Replacing a roof vent on your own can range from $10-100. While hiring a professional contractor to complete the repair can cost between $300-500. Replacing your roof can cost upwards of $20,000.

When you resell your home, the vents are one of the things that an inspector will use to judge the health of the roof. Flaking shingles, rusted flanges, curved edges, or other apparent damage will be a red flag to any inspector looking at your home when you try to sell it. An inspector will crawl up into the crawl space and inspect the trusses and other structural components for water damage, pests, and mold caused by excess moisture.

The Importance of Roof Vents in Southeastern Florida

Florida comes with its fair share of wild weather events, and unexpected adversities for homeowners. Between tropical storms and sweltering temperatures, Florida is known for its crazy weather. Tornado Roofing has been working in the Florida area long enough to have seen it all. 

The humidity of a Florida summer can be miserable at the best of times. It’s even worse when you’re storing the heat of an oven in your attic. The temperatures in an unvented attic space can easily exceed the 100ºF mark. Add humidity and your air conditioner doesn’t stand a chance. Energystar rated homes with proper roof vents are significantly more efficient than those without them.

Roof Vents

Temporary Fixes

Slapping a bandaid on a major repair like a roof vent is temporary. While wrapping a towel around the leak, or putting tape around the weak point may seem to stretch the life of the vent a bit longer, avoiding the repair doesn’t make the damage go away. 

If you can replace just the broken parts, you can avoid spending more than necessary on your roof vents. Replacing them when they become damaged will increase the overall longevity of your roof.

Whatever short term solution you choose, use the time bought by the temporary repair to plan out your permanent solution. If that means taking a weekend to repair the roof vent, most home repair stores have the necessary parts. If you choose to hire a professional, make sure they’ve got the experience and expertise to back up their work.

Steps for Doing It Yourself

For one who considers themselves handy, a roof vent repair is a fairly basic task. With the right tools and an afternoon to work on the project, you’ll find that replacing leaky vents isn’t a difficult task.

For an Angled or Pitched Roof:

  • Identify the cause of the leak. Knowing the anatomy of a roof vent will help you understand the points that could be leaking. Most often, it’s damage to the pipe or the metal flanging under the roofing materials. 
  • Remove the shingles or tiling around the vent. Carefully pry the roofing material around the vent pipe away from the area. Mind the structure and waterproofing on the underlayer. 
  • Carefully remove the flashing. Slide the edge of a pry bar under the flashing, and use a piece of scrap wood to lever the flashing away from the roof. 
  • Slide the flashing off. Be careful not to knock the pipe out of place, or to damage the space around the pipe. Remove nails from the flashing, and fill holes with roofing cement. Secure the new flashing with roofing nails and add roofing cement to seal. 
  • Re-install the shingles over the new flashing. Using roofing nails, and starting in the bottom row, layer the shingles to match the surrounding roofing. Seal the original nail holes with roofing cement. 

For a Flat Roof:

  • Clear a 4 foot square of space away from the vent. Then, clean all gravel and other debris clear of the area you’ll be working on. 
  • Find the edge of the flashing, and cut around it, through the roofing felt. Using a pry bar and scrap wood, carefully pry it away from the roof. 
  • Lift the flashing off of the vent pipe, and inspect the pipe for damage. Careful not to knock the pipe out of place. 
  • Position the new flashing on the pipe and mark the footprint it leaves. Use this marking to cut away the roofing felt around the pipe. 
  • Cut a patch to match the space removed. Create a layer of 15 lbs roofing felt for each segment of roofing you can see in the hole. Mark a hole for the vent pipe, and cut it from the roofing, felt layers so that they will fit snugly over the pipe. By alternating roofing cement and felt, fill the hole around the vent until the top layer of felt is even with the roofing material. 
  • Carefully position new flashing on the vent pipe, and line it up with the patched hole the way the previous flashing was. Use roofing nails to secure the new flashing and seal with roofing cement. Using pliers, fold the vent pipe edging over to lock the flashing in place. 
  • Create another layer of roofing felt that is 3 inches larger than the hole, and a 2nd that is 6 inches larger. Layer them with the roofing cement to seal the new patched roof vent. 
  • If you swept gravel off the space in step 1, use it to cover the bare spot. Otherwise, you’re done. Carefully climb down and appreciate your hard work. 
Call Us Now!

Tornado Roofing and Contracting, Inc.

If the DIY aspect is more than you want to take on, we’re here to help. When you need a fast local company to repair your leaky roof vent, know that you can depend on Tornado Roofing and Contracting, Inc. We’ve been serving the Southeast Florida region for more than 30 years. We’ve got extensive training on roofing needs, including install, improvement, and repair.

By |2022-01-10T07:24:36+00:00May 27th, 2020|Roof Repair, roofing contractors|0 Comments
Go to Top