How To Conduct a Proper Roof Inspection Service

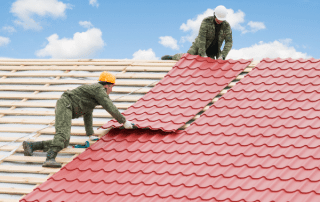
With more than 100 types of roofing systems, and your roof playing such an important role for your home, regular inspection is key. Perform your own roof inspections at least twice a year once in the spring and again in the fall and any time there’s been a major storm.

Keep in mind, though, roof inspections are more than just walking around your home and looking up. Here’s what you should do when properly conducting a roof inspection service.

Start With the Gutters

The gutters are a major part of your roofing system. Qualified roof inspectors always pay attention to the condition of gutters.

If your roof needs a drip edge replaced, but the gutters are attached through it, then it cannot be replaced. If your home has gutter guards installed, they may need to be removed to install a new drip edge. If you need a new drip edge installed, there will be more time and labor involved.

In poor shape, the gutters won’t allow for proper drainage, which can lead to clogs, roof damage, and more. When there’s a leak in the gutter, that’s a sign that the homeowner will have more extensive damage to deal with later, if the gutters aren’t repaired.

When looking at gutters, take a few minutes to look at the underlayment to what condition it may be in. This also helps to determine how the roof was initially built.

Look at the Roof’s Flashing

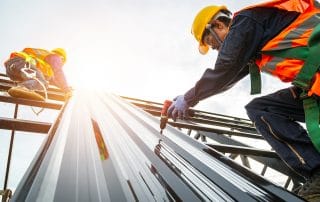
This requires getting up on the roof, so make sure you have the necessary safety equipment and a spotter available if you decide to do it yourself. Without getting up on the roof, it’s impossible to see whether the flashing needs to be replaced, and without that there’s no way to provide an accurate estimate of necessary repair or replacement.

If your roof flashing is damaged, you could have a lot of damage underneath. That could lead to leaks and more extensive damage to other areas of your home depending on where the flashing is damaged.

Skylights? Check Those Too

If your home has skylights, you need to check around those. If you’re planning a full roof replacement it’s generally expected that you’ll replace the skylights as well. The average skylight lasts anywhere from 18 to 22 years.

Even if your skylight is working well right now, if it’s been close to 18 to 20 years since it was last replaced or first installed, it’s typically more cost-effective to replace your skylights when you replace your roof.

Inspect the Chimney, Vents, and Soil Stack

Take the time to inspect the chimney (if your home has a fireplace), along with soil stocks, and any vents in the roof. Cracking around the seals, broken shingles, etc. could let water make its way into your attic and in the walls of the home. These small details matter because if left unattended, can lead to extensive damage.

While it may be tempting to reinstall a soil stack with a few years left in its lifespan, reinstalling one that will fail before it’s time for another roof replacement will only cause more trouble over the long term.

Check the Attic

Taking a trip to the attic will give you a chance to see what the roof is like from the home’s interior. Here, look closely at the ventilation. Check for rotten wood and signs of water damage, like wet insulation.

If there’s not a lot of insulation in the attic, that subjects the roof to more damage because of the excess Florida heat that can make its way through. Though Floridians don’t have to worry about snow melting and refreezing rapid heating and cooling as temperatures change can still lead to issues.

Roof Inspection Services from Tornado Roofing

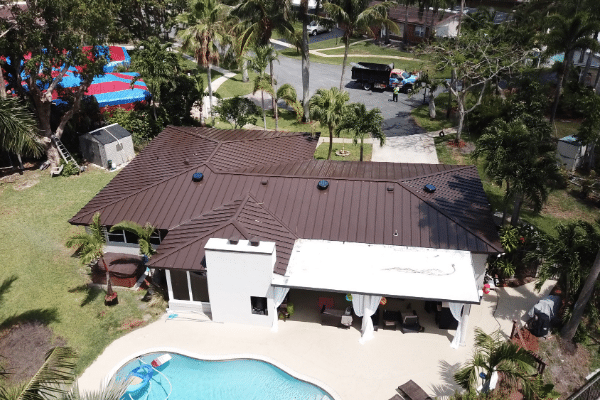
If you notice damage or issues with your roof inspection, it’s time to call in a roofing professional for a second opinion. At Tornado Roofing, after our thorough inspection, we’ll provide you with a detailed roof inspection report. Within that report, you’ll find recommendations and cost information to help you determine the extent of the project.

Whether you need a completely new roof or some repairs to keep it in tip-top shape for another few years, our professionals can give you peace of mind. If you live in or around Ft. Lauderdale or Naples, you can contact us to schedule a free roof inspection and estimate from a certified roof inspector.

Call Us Now!
By |2022-02-25T19:43:14+00:00November 2nd, 2021|Blog, Roof Replacement|Comments Off on How To Conduct a Proper Roof Inspection Service

How to tarp a roof- Complete Guide

When your roof is not in a condition to protect the interior from elements, then ideally it should be repaired or replaced. But you might not have the money to fund a roof repair or roof replacement project right away, or even time to do the project. That’s perhaps the reason you are considering to tarp it. Proper tarping protects the interior of your home from damaging elements for a while as you ready yourself to tackle the cracks, missing shingles, punctures, and or any other roof weaknesses. For a while, you will also be preventing further damage to your roof.

At Tornado Roofing, we’ve received calls before or after a storm to give a temporary solution for a damaged roof. Tarping often makes sense in most situations because it keeps your home dry as you prepare to repair or replace your your leaky roof. So what goes into the process of tarping a roof?

Get A Free Roofing Estimate Now!

Tools and Materials You Need to Tarp Your Roof

Just like any other roofing project, to successfully tarp, your roof requires tools and materials. This project needs the following materials at a minimum for a professional roofing contractor to handle:

  • A drill
  • A hammer
  • Tarp(s)
  • Studs
  • Cap Nails
  • A Ladder
  • A tape measure
  • A pair of boots
  • Thick gloves
  • A torch
  • Protective eyeglasses
  • 2 by 4 Boards
  • Screws
Metal Roofing

Step 1: Assess the Roof Damage

Start your assessment from the attic with your torch. Look for water stains or light coming in through the roof to get an idea of where the problem is. This could be several places on your roof. Then use your ladder to climb up the roof so you can assess the roof condition. It’s safer to examine the roof from your ladder to avoid falling off. As you do this, take lots of photos of the damaged sections of your roof; from within the attic and outside as well. You’ll use these for insurance claims.

Measure the extent of the roof damage using your tape measure. Move closer to the damaged area of the roof, then carefully kneel close to it and measure. Take the exact dimension on each side of the damage. This helps you determine the size of tarp you’ll need. If your roof is too steep, you should just call a roofing expert to do the job rather than risk climbing up on it. Also don’t work on a wet roof.

Step 2: Buy the Right Tarp

Tarps come in varied sizes and colors. So because you have the damage measurements, choose a tarp with a size that’s larger than the damaged area. Some people go for tarps that can cover most parts of the roof, but choosing the right fit for the damaged part is better. If possible find a vendor that customizes tarps for specific needs. Then instruct them to make a tarp that is capable of covering the problem spots, leaving three feet of the excess tarp around the damaged area. Consulting with a professional roofer or tarp vendor will also help you make the right choice here. You might also want to consider the color of the tarp and its thickness.

Step 3: Cover the Holes in the Roof

If your roof is badly damaged and has big holes, use plywood to cover these potholes. Secure this sheet of wood using screws. Doing this prevents creating pools of water after you’ve installed your tarp.

Step 3: Cover the Holes in the Roof

If your roof is badly damaged and has big holes, use plywood to cover these potholes. Secure this sheet of wood using screws. Doing this prevents creating pools of water after you’ve installed your tarp.

Get A Free Roofing Estimate Now!

Tornado Roofing Your Best Florida Roofing Company

Regardless of the metal roofing system you choose, you want it to be installed properly by an expert roofer. That way, you enjoy the full value of your investment. At Tornado Roofing, we give free quotations on roofs for all types of buildings and do the best installation to achieve durable and visually pleasing results. If you need to install a metal roof on your home or business premises in Florida, reach out to us.

By |2022-01-10T07:24:34+00:00January 30th, 2021|Roof Replacement|0 Comments

Metal Roofing Costs – 2020 Price & Buying Guide

Installing a metal roof costs more compared to the usual roofing materials like asphalt shingle systems. But the high costs come with a lot of benefits. You can expect beautiful styles, weather-resistant interlocking abilities, a cooler home, a fireproof roof, more than a half-century of service with little to no maintenance. Investing in metal roofing provides you with about 85.9% return on investment in America. To install metal roofing, you’ll spend between $1.80 to $15 for every square foot.

The roofing costs of a metal roof will depend on your material choice. You can select aluminum, copper, standing seam metal, steel metal, tin, or zinc metal roofs among other options. Corrugated metal roofs are the cheapest, costing between $1.80 $2.50 per square foot. Tin and Zinc roofs are some of the expensive metal roof options, with the installation costs ranging between $3.25 to $14.65. Steel metal roofing is the most popular roofing option in America and costs between $3.35 to $4.50.

Looking for precise pricing for your home’s roof? Contact Tornado Roofing to get advice from our in-house metal roofing experts.

Get A Free Roofing Estimate Now!

How to Estimate the Cost of Your New Metal Roof

For a roofing expert to conclusively provide a quote for your metal roof, they need to determine the size of your home. The second thing to look at is the shape of your roof. Unique shapes, designs, and additional details make a metal roof installation costlier. Also, metal roofs come in varied qualities as well as thicknesses so this will impact the installation pricing as well.

Bringing the current roof down and the reason why you want to remove it, as well as the existing weather conditions will contribute to the installation price. Another thing you might forget is the season your metal roof is being installed. After events like tornados and hailstorms, roofing contractors are often in high demand making the market costly. If your project can wait, consider installing it in seasons that are less busy for roofers.

That said, we recommend to start estimating the cost of your roof by measuring the square feet of your home (which could be anywhere between 1500 2000) at $10 per square foot. With this, your estimation won’t be far from the target. But because there are many metal roofing options, the installation pricing will vary.

Metal Roofing

Metal Roofing Costs Vs. Shingles

Installing metal roofs costs double or triple the installation of asphalt shingles. While both metal and shingle roofing depends on location, the size of your property, style requirements and other variables, metal roof installations offer more advantages.

Metal roofs have a higher resale value. Also, metal roofs are more energy efficient because they significantly reduce heating and cooling costs. And depending on the type of metal you choose and the quality of installation, maintenance becomes optional and multiple times easier if necessary. You shouldn’t expect repairs or premature failures until you decide they have served you long enough. If you live in a place where wildfires and other fire disasters are common happenings, you can count on metal roofs to protect your home.

Types of Metal Roofing

There’s a lot to choose from when it comes to metal roofs. If you are not decided yet on the best metal roofing for your home, here’s a list of the common metal roofs out there.

  • Corrugated metal roof
  • Copper Roofing
  • Aluminum roofs
  • Metal slate roofs
  • Standing seam metal roofs
  • Tin Roofing
  • Steel roofs
  • Zinc metal roof
  • Metal tile roofs

Steel roofing is a common choice for property owners because they produce roof surfaces that effectively shed snow and rain. When you choose this option, you should hire a professional roofer to install them properly. Otherwise, the results will be noisy when it rains.

Get A Free Roofing Estimate Now!

Tornado Roofing Your Best Florida Roofing Company

Regardless of the metal roofing system you choose, you want it to be installed properly by an expert roofer. That way, you enjoy the full value of your investment. At Tornado Roofing, we give free quotations on roofs for all types of buildings and do the best installation to achieve durable and visually pleasing results. If you need to install a metal roof on your home or business premises in Florida, reach out to us.

By |2022-01-10T07:24:34+00:00November 3rd, 2020|Roof Replacement|0 Comments

How to Fix a Leaking Roof From the Inside

You are probably being rained on right now, and that’s why you’re searching for ways to fix your roof from the inside. Good for you because you are in the right place. Fixing roofs can happen in many ways, including doing the project from the inside of your home. If you think this is impossible, contact Tornado Roofing roofing services experts to learn how we can get help. But if you still want to understand the fixing process, here’s your guide.

Call Us Now!

The good thing about repairing your roof from the inside is that you can do it as a solo project, and don’t require a complete set of professional tools to complete the process. Some of the tools you’ll need include:

  • A flashlight
  • Scraper
  • Caulking
  • Nail
  • Gallon Bucket
  • Roof tar (patch)
  • Utility knife
  • Rubber gloves

Here’s How to Fix a Roof From the Inside

It’s worth noting that fixing a roof from the inside is a temporary measure. Once you are done with the fixing, consider getting a professional roof repair or replacement expert to give you a permanent solution. In other words, doing this helps you buy some time for the current rainstorm to pass or get a better roofing solution the following day. All this depends on the age and condition of your roof. So what should you do?

How to Fix a Roof

Access the Attic

You want to get past your ceiling to reach your damaged roof. That means you should remove part of your ceiling and find your way through. The next thing to do is to get rid of any stagnant water. Use sponges or rags. If the water is a lot, drain it into a bucket big enough to accommodate all of it. If the ceiling has seeped water, be careful when moving around it so it doesn’t fall through due to your weight and tools.

Identify the Leak and Seal Them

You want to make sure your work area is dry, and you are in a position to see all the leaks plus remain safe. If it’s during the rainy season, you can identify the leak by the damp places on the ceiling. You might also spot mold or dark patches on the ceiling board. Do this with the help of your flashlight. If it’s daytime, you’ll probably see light penetrate through the holes. Once you’ve spotted the damaged areas, mark them with chalk.

The next step is to ensure the area is dry so that your roof tar can stick. Prepare a proportionate roof tar to the leak and smear it across the damage with a knife. After doing this, place a piece of plywood on the tar and spread more tar around the edges. If you want to reinforce your patch, use rubber on the outside of the leaking area.

Emergency Leaking Roof Fixes When You Don’t See the Leak

In some situations, you won’t see the leak. What do you do? You should try the alternative method, which involves the use of a plastic roof covering from the outside.

Roof Leaks and Repair or Install a New One

Purchase a Roof Plastic

Your local hardware store should have roof plastics. These are specially designed from polyethylene to unfold and cover a leaking roof. You’ll get then in 4-foot rolls from a local vendor or wider alternatives, depending on the size of your roof. What you want is a big enough roll that can cover your roof surface from the ridge to the eave of the affected area. Also, get anchors that will help you position the roof plastic during the installation.

Cut and Install

Measure your roof then cut the roof plastic in a slightly bigger measurement to the roof surface area. Then roll each end of the plastic roof to the anchors by using the utility staple gun to position it tightly. With some help from a partner, lay it on from one end to the other side of your roof. This process will require some guts from you because you’ll have to climb your roof and move around it.

If there’s lightning or a storm, you want to avoid doing the work without professional help. Call experts who have the equipment and knowledge to do it.

Call Us Now!

Naples’ Favorite Residential Roofing Contractor

What if I can’t fix the roof? Roof work can be challenging, particularly if you have little knowledge about what to do. And when risks like lightning and storms are involved, it becomes an impossible mission for some individuals. If you are in such an instance and unable to do the work on your own, contact professional roofers.

Tornado Roofing is your ideal partner in such a situation. Contact us so we can assess the condition of your roof and provide relevant solutions. Here’s how to go about the contractor hiring process. We guarantee quality roof repairs and installations and interestingly low prices for our services. Reach out to us at any time.

By |2022-01-10T07:24:34+00:00September 29th, 2020|Roof Repair, Roof Replacement|0 Comments

Roof Installation: 7 Steps To Successfully Replace Your Roof

With residential properties, there is always something that appears to require the attention of the homeowner. The toilets that hardly flush, air conditions that don’t cool, leaking faucets, and more, are always on top of the list. Unfortunately, many people often neglect the roof over time. You can ignore them when something important is competing for your attention. That is why you need the best residential roofing installation company that can maintain or replace your roof and ensure that it serves you for the longest time possible. That would be a job for Tornado Roofing and Contracting Inc.

Call Us Now!

There is no group other than our well-trained and experienced contractors to trust. We provide dependable roof installation services, use quality roofing materials, such as slate tiles, asphalt shingles, and impact-resistant shingles. Most importantly, unlike other roofing companies, we follow the approved steps to offer you the best residential roofing installation service. Here are the steps that we follow when replacing your roof. 

Step 1: Roof Installation Begins With a Pre-plan

Like any other important work, we start your roof replacement with smart-pre-planning to ensure you get optimal results. Our experienced contractors carefully inspect your property to determine how much materials you need and the best way to handle it from the beginning to completion. This way, you get all the information you require, including a solid start date, to plan.

Step 2: Ensure Property Safety

Because we are ensuring you get the best residential roofing installation service, we embark on ensuring your property is adequately protected during the installation once you approve our plan. We prioritize the safety of your walls, siding, windows, trees, houseplants, bushes, and more. We bring on the job site roof jacks, ladders, a dumpster, protection plywood and tarps, and the roofing material.

replace your roof

Step 3: Remove the Old Roofing Materials

At this stage, our experienced contractors remove the old shingles to inspect the wood decking properly. We also do this and take it seriously since our policy prevents us from putting new roofing materials over the old ones. The experts here at Tornado Roofing and Contracting Inc know that doing that would prevent us from laying the new shingle on the deck as required. Besides, it would weaken and reduce the lifespan of the new roofing materials. As such, since we guarantee you the best residential roofing installation service, we remove the old shingles and roofing nails and flashing at once. 

Step 4: Inspect the Roof Deck

Our team of experts thoroughly inspects the wood decking to determine whether we need to come up with a better base for the new roofing structure. This is essential as we use the best shingles, and you need them to remain intact for several years. If we notice any rotten, wet, or softwood during this process, we mark them for replacement. We also inspect the wood sheeting to find the best ways to make it adequately attached to your roof rafters. 

From our experience, this is where many roofing contractors go wrong. Instead of taking their time to check for any missing nails at this stage, they start doing other things that they consider more important. Here at Tornado Roofing and Contracting Inc, we re-nail the old wood decking to ensure you get impressed after the installation process. Besides, we guarantee you will never see bumps on your roof at any moment after we leave your premises. 

Step 5: Prepare the Deck

After completing the inspecting, our roofing professionals prepare the deck for the new shingles. This means we install a drip edge. This metal that mends at a right angle (90 degrees) is designed to prevent rainwater from finding its way underneath your roofing materials.

Other than installing the drip edge, we install the ice and water shield. This exclusive roofing underlayment sticks to the decking and, therefore, effectively prevents water leaks. To give you the best result, we install it at the bottom of your roof and all your roof penetrations, which include the roof connections, chimneys, and more.

The last thing that we do to prepare for the shingles is to install your roofing felt. When we cover your roof with this material, your shingles will never stick to the roofing wood. A good reason we know that our team of contractors is offering the best residential roofing installation service is that they use heavy-duty roofing felt that guarantees you the results. 

roof Installation

Step 6: Install the New Roofing Material

At this stage, we lay out the roofing material professionally. We start from the bottom edges and work upwards. By working this way, we successfully overlap the new shingles to shed water. After that, we place special caps on the hip rises and at the peak. Next, we carefully cut the shingles over or around dormers and in the valleys. 

Step 7: Clean Up the Site and Inspect the Roof 

Our job is never complete until we remove all the wastes from the job site. Our contractors dispose of all of them and do not leave any cleaning work to do after they go. Once you are satisfied with the cleanup, we embark on conducting the final inspection. We have experienced supervisors who understand the unique quality that we know defines the best residential roofing installation.

We send them to conduct a meticulous and objective post-roofing inspection. As your top construction company, we believe it is our job to ensure that your roofing replacement meets and exceeds your expectations. In the unlikely scenarios that we discover that something has not been done to the highest standards or your complete satisfaction, we correct it at our own cost. In other words, here at Tornado Roofing and Contracting Inc., we offer our esteemed clients like you 100%-satisfaction guarantee.  Moreover, we respect them and are committed to giving them a memorable experience.

Call Us Now!

Call the Experts for the Best Residential Roofing Installation

Do you need the best residential roofing installation service anywhere in Florida? Feel free to contact Tornado Roofing and Contracting Inc. today. Our Well-trained and friendly contractors are on standby to give you the right feedback and quickly solve your roofing needs.

By |2022-01-10T07:24:35+00:00August 18th, 2020|Roof Replacement|0 Comments

How Should I Prepare for a Roof Replacement? 14 Expert Tips

A roof replacement project is a big deal that requires input from both the owner and the roofing company. As the property owner, your part is to prepare the premises before the installers arrive. Once the roofers have come, the property becomes a busy work zone that cannot accommodate multiple activities. So, the preparation ensures that the roofing process is smooth so that everything happens within the set time limits, and everyone comes out safe. 

So, what should you do to prepare for a roof replacement? Here are tips from our experts to help you have seamless roofing experience.

Call Us Now!

Evacuate Everyone Including Pets

Your home is going to be a busy place during the roof installation process. From loud noises to endless traffic, this place will be an uncomfortable place for the elderly, kids, and pets. Expect interruption from your daily schedules and sleeping patterns in the meanwhile. Everyone else needs evacuation because only the workforce has the protective gear to be on site.

Talk to everyone that lives in your home before the roof replacement so they can prepare to evacuate. Children will require some explanation of why they shouldn’t stay or play on the property. If your place is small, find different accommodation to relocate your family during this time. Ideally, send them for a visit to your relatives and friends.

How should I prepare for a roof replacement

Leave the Gate(s) Open

The roofers working on your house will want free access to and out of your compound. Don’t make it difficult for them to ask for keys every time they need to move in or out. Open the gates or give the keys to the project manager to ensure every movement is flawless.

Relocate Your Vehicles

Your contractor needs space to work, and the parking lot is one of those places. That’s where the workforce will be moving, keeping their tools and materials, plus their company truck. Therefore, you need to find temporary parking where your vehicles will be safe. You might want to seal the garage doors to keep the falling roofing debris out.

Remove Wall Decor

Your home will be a beehive of activities during a roof replacement. There’s going to be vibration from machinery, hammering, and movement, which will shake up things a little. So if you have pictures, pieces of art, light fixtures, and any other hanging decor on the walls, remove and secure them in a place they can’t damage. Only leave decorations that are permanently attached to the walls.

Clear Your Furniture

Patio furniture can impede movement during a roofing process. The workers could waste their time moving it from one corner to the other or trip on them, which is an inconvenience. So, move them out of the patio to a shade, garage, or elsewhere. If you don’t have room in your garage, putting the furniture in your yard at a safe distance is good enough for the roofing operations to continue. Remember to cover them so they don’t damage under direct sunlight.

Call Us Now!

Cover Immovable Stuff

Everything needs to be at least 15-feet from the house during a roof replacement. Unfortunately, not all things can move. These could be stuff like gazebos, permanent decor features, kitchen cabinets, among other things. The safe way to deal with such is by covering them with tarps and curtains. So when shingles and building debris fall, they are safe.

Protect Plants and Flowers

If your compound has plants and flowers that you intend to keep, protect them through covering and marking. Use nets and tarps to cover flower beds and mark trees using an orange tape. Doing this will alert the roofers to be careful when working next to these. The best way to ensure care to your plants and flowers is to talk to the project manager about it.

Cut the Grass and Prune Trees

Long grass will hide fallen roofing debris, which might give a hard time to cleaners. Besides, nails could hide in the long grass and pose risks to those who walk through it. So, cut it a day before the construction and clear all the grass to make the debris cleaning easier and thorough. Also, if you have a tree with long branches that hang close to the roof, you want to prune it to give room to the roofers to do their work.

Your Neighbors Need to Know

Your neighbors should be aware of your roofing project before it starts. This way, they’ll understand all the noise, the flying nails, and the debris in their yards. They might need to remove movable stuff, cover their plants, and even give access to their property in case shingles fall in their compound.

Roof replacement

Check the Electricity Connectivity

You don’t want to endanger the lives of roofers. Covering necked wires and removing some of the cables running too close to the roof is great. The roofing company might want to run their equipment using your electricity. In this case, ensure the power outlets are functional to avoid delays.

Antennas and Satellite Dishes are Not Needed

You must remove antennas and satellite dishes from the roof to pave way for the roofers to do their work. If you cannot do it by yourself, contact your cable and satellite provider to remove them for you.

Clear the Attic

If you have stuff in the attic, remove them. In situations they cannot be moved, use covering materials to secure them from dirt. And because most of the debris will gather in the attic, look for ways to lay coverings to make cleaning easier.

Protect the Windows and Fragile Items

If your doors and windows are glass, cover them with boards so they don’t get scratched by falling materials. You also want to secure fragile items like vases, glasses, and plates so they are away from the walls and placed in areas you cannot reach.

Turn Off the Sprinkler System

You should turn off your sprinkler system early enough so the grass isn’t wet during work hours. Doing this helps you avoid wetting the roofing materials as well as protect the workers from showers. If the piping is on the surface and too close to the house, move it away.

Call Us Now!

Call Your Roofing Replacement Services Now

While some roofing installation companies do more than just installing the roof, it’s a good thing to prepare your property before they come. Doing this protects your stuff as well as gives ample time to roofers. The roof replacement will interfere with normal activities, and it helps if everyone in your home and neighbors know it. If you’ve taken prior preparation according to what we’ve discussed above, you can now call your roofing replacement services. Remember that these inconveniences are short-lived, and you’ll soon go back to normal.

By |2022-01-10T07:24:35+00:00July 23rd, 2020|Roof Repair, Roof Replacement|0 Comments

Roof Replacement Cost Guide for 2021

If your home wasn’t built in the last decade or so, you’re likely looking at a roof replacement in your near future. It can seem daunting, both in the costs and in the magnitude of the project. The roof replacement cost can be affected by a number of factors.

Roofing is a project that’s best done by professionals. This adds to the initial roof replacement cost but will prevent future costs from damages caused by improper installation. An improperly installed roof can lead to damaged attic insulation, waterlogged walls, cracked foundations, and water damage throughout the home.

Call Us Now!

Roof Replacement Cost Breakdown

Roofing contractors will break down the costs into several categories. The main categories that can affect the cost of your roof replacement are the

  • Size, pitch, and height of your roof
  • Cost of removing the old roof
  • Materials your select for your new roof
  • Extent of underlying damage in the decking and rafters.

Calculating the Size, Pitch, and Height of Your Roof

Your contractor will calculate the size of your roof based on measurements taken at your consultation, and use these numbers to estimate the square footage of coverage they’ll need for materials. This can be affected by how many times the direction of your roof changes. Every time your roof comes to an intersection with another section of the roof, you’ll need additional materials to ensure watertight seals.

The pitch of your roof means finding out how steep your roof is, the steeper the roof pitch, the more dangerous the job. This is a significant reason to hire a professional. Each year, thousands of people end up in emergency rooms due to falls from their roof.

Looking at the danger side of the estimate, the height of your roof plays into this cost. The higher your roof is, the farther they fall. If you’re re-roofing a single-story home, your estimate may be less than if you’re re-roofing a 3 story home.

Quick Roof Tips | Best Roofing Company Near South Florida

Selecting Roofing Materials

The selection of materials for your roof replacement will be a huge factor in your overall price. Not only do the different materials change your cost, but the quality of those materials can shift your numbers.

  • Flat Roofs This roof style is common. This process involves rolling out gravel like sheets of material and using a propane tank and heat wand to melt the tar-like adhesive, sealing it to your roof base. It is mostly used in arid climates and allow the roof space to be used as a living space or a living room
  • Shingle Roofs This is the most common form of roofing material, not only for Florida but most of the nation. Asphalt shingles are relatively inexpensive and easy to replace for minor repairs. Architectural shingles are also an option, though carry a higher price. This is also the lightest weight option.
  • Tile Roofs Heavy and labor intensive, this roofing option is on the more expensive side. But if it’s in the budget, the results can be stunning. Tile roofs require special equipment to raise the tiles up to the rooftop and can be limited by accessibility. They can be installed in intricate and beautiful designs to create an absolute showstopping roof.
  • Metal Roofs For weatherproofing your home, metal roofs lead the pack. They do require special equipment and training to install but may withstand the rough weather Florida is known for. Most metal roof options come pre-treated for corrosion resistance. Metal roofing is impervious to water damage when it’s installed correctly.
Call Us Now!

Hiring A Roofing Professional

When the cards are all out on the table, a roof replacement is a huge job. It comes with heavy expenses and even heavier materials. The successful installation of your roof will dictate costs for home maintenance for decades down the road.

The task can be dangerous, and carry with it lasting damages if done wrong. The only insurance company we want to see you need is your homeowner’s insurance helping to pay for the replacement (speak with your insurance agent to discuss this possibility). Peace of mind is worth the roof replacement cost.

Tornado Roofing & Contracting are experienced building contractors that will ensure the installation of a roof that will protect your home for quite some time to come. Give us a call to schedule a consultation.

By |2022-01-10T07:24:53+00:00May 14th, 2019|Roof Replacement|0 Comments
Go to Top