Your attic space holds a lot of heat. In the hotter months, the space between your roof and your ceiling can cause a lot of stress on your air conditioning system. While a handy individual can install or repair a roof vent, some people prefer to hire professionals. Tornado Roofing has years of expertise in a variety of roofing repairs.
Table of Contents
How Does a Roof Vent Work?
When your crawl space doesn’t have enough airflow, it can trap air and moisture. Inadequate insulation can also encourage decay, mildew, and pests. An air vent in your roof provides airflow and cooling. Combined with quality insulation, air vents can significantly reduce your heating and cooling bills.
What are Plumbing Vent Pipes
Along with the roof vents you may also find that your home likely has a plumbing vent pipe. Similar to the plumbing pipes that move water in and waste out of your home, the plumbing vent runs through your home and out through your roof. The plumbing vent pipe helps to regulate the air pressure in your plumbing, and prevent clogs.

Roof Vent Damage: Bigger Problems
When a roof vent gets damaged, it can lead to costly repairs. Leaking vents can rot the roof from the inside, and create a dangerous environment for you and your family. If the damage isn’t repaired, it can create irreparable damage. Water is the enemy of building structures. Most building materials aren’t meant to be exposed to standing water. Further, moisture breeds mold, and mildew.
Repairing a vent can seem expensive, but letting the damage spread could lead to a full roof replacement. Replacing a roof vent on your own can range from $10-100. While hiring a professional contractor to complete the repair can cost between $300-500. Replacing your roof can cost upwards of $20,000.
When you resell your home, the vents are one of the things that an inspector will use to judge the health of the roof. Flaking shingles, rusted flanges, curved edges, or other apparent damage will be a red flag to any inspector looking at your home when you try to sell it. An inspector will crawl up into the crawl space and inspect the trusses and other structural components for water damage, pests, and mold caused by excess moisture.
The Importance of Roof Vents in Southeastern Florida
Florida comes with its fair share of wild weather events, and unexpected adversities for homeowners. Between tropical storms and sweltering temperatures, Florida is known for its crazy weather. Tornado Roofing has been working in the Florida area long enough to have seen it all.
The humidity of a Florida summer can be miserable at the best of times. It’s even worse when you’re storing the heat of an oven in your attic. The temperatures in an unvented attic space can easily exceed the 100ºF mark. Add humidity and your air conditioner doesn’t stand a chance. Energystar rated homes with proper roof vents are significantly more efficient than those without them.

Temporary Fixes
Slapping a bandaid on a major repair like a roof vent is temporary. While wrapping a towel around the leak, or putting tape around the weak point may seem to stretch the life of the vent a bit longer, avoiding the repair doesn’t make the damage go away.
If you can replace just the broken parts, you can avoid spending more than necessary on your roof vents. Replacing them when they become damaged will increase the overall longevity of your roof.
Whatever short term solution you choose, use the time bought by the temporary repair to plan out your permanent solution. If that means taking a weekend to repair the roof vent, most home repair stores have the necessary parts. If you choose to hire a professional, make sure they’ve got the experience and expertise to back up their work.
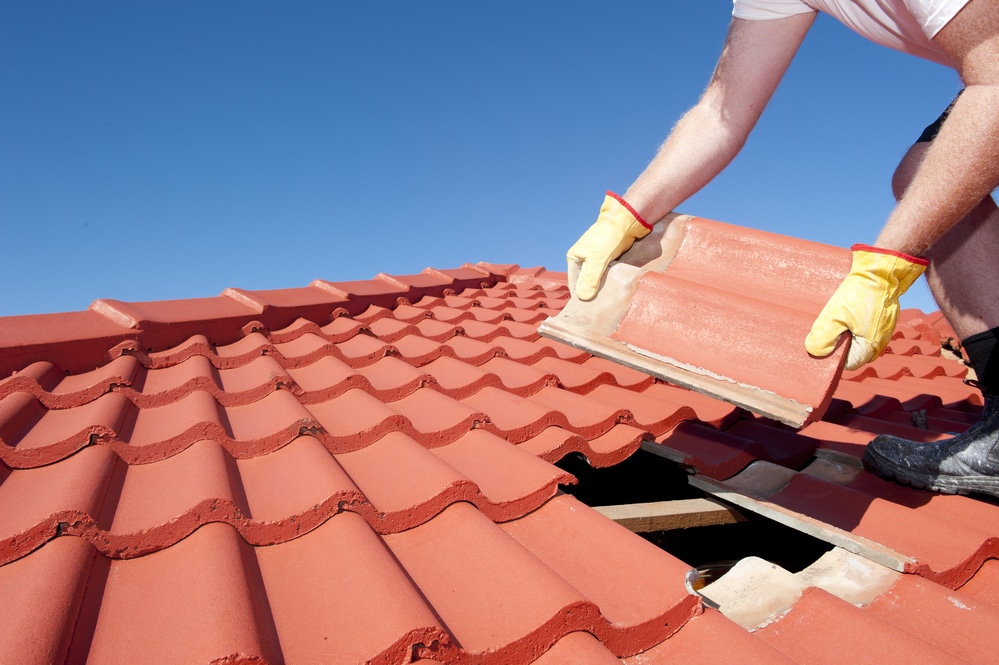
Steps for Doing It Yourself
For one who considers themselves handy, a roof vent repair is a fairly basic task. With the right tools and an afternoon to work on the project, you’ll find that replacing leaky vents isn’t a difficult task.
For an Angled or Pitched Roof:
- Identify the cause of the leak. Knowing the anatomy of a roof vent will help you understand the points that could be leaking. Most often, it’s damage to the pipe or the metal flanging under the roofing materials.
- Remove the shingles or tiling around the vent. Carefully pry the roofing material around the vent pipe away from the area. Mind the structure and waterproofing on the underlayer.
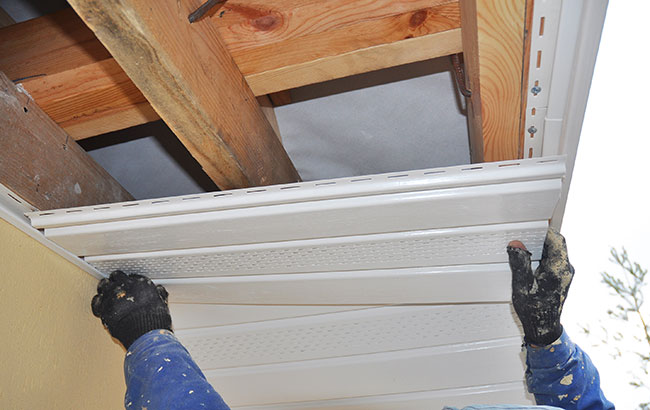
- Carefully remove the flashing. Slide the edge of a pry bar under the flashing, and use a piece of scrap wood to lever the flashing away from the roof.
- Slide the flashing off. Be careful not to knock the pipe out of place, or to damage the space around the pipe. Remove nails from the flashing, and fill holes with roofing cement. Secure the new flashing with roofing nails and add roofing cement to seal.
- Re-install the shingles over the new flashing. Using roofing nails, and starting in the bottom row, layer the shingles to match the surrounding roofing. Seal the original nail holes with roofing cement.
For a Flat Roof:
- Clear a 4 foot square of space away from the vent. Then, clean all gravel and other debris clear of the area you’ll be working on.
- Find the edge of the flashing, and cut around it, through the roofing felt. Using a pry bar and scrap wood, carefully pry it away from the roof.
- Lift the flashing off of the vent pipe, and inspect the pipe for damage. Careful not to knock the pipe out of place.
- Position the new flashing on the pipe and mark the footprint it leaves. Use this marking to cut away the roofing felt around the pipe.
- Cut a patch to match the space removed. Create a layer of 15 lbs roofing felt for each segment of roofing you can see in the hole. Mark a hole for the vent pipe, and cut it from the roofing, felt layers so that they will fit snugly over the pipe. By alternating roofing cement and felt, fill the hole around the vent until the top layer of felt is even with the roofing material.
- Carefully position new flashing on the vent pipe, and line it up with the patched hole the way the previous flashing was. Use roofing nails to secure the new flashing and seal with roofing cement. Using pliers, fold the vent pipe edging over to lock the flashing in place.
- Create another layer of roofing felt that is 3 inches larger than the hole, and a 2nd that is 6 inches larger. Layer them with the roofing cement to seal the new patched roof vent.
- If you swept gravel off the space in step 1, use it to cover the bare spot. Otherwise, you’re done. Carefully climb down and appreciate your hard work.
Tornado Roofing and Contracting, Inc.
If the DIY aspect is more than you want to take on, we’re here to help. When you need a fast local company to repair your leaky roof vent, know that you can depend on Tornado Roofing and Contracting, Inc. We’ve been serving the Southeast Florida region for more than 30 years. We’ve got extensive training on roofing needs, including install, improvement, and repair.

